Thursday, April 28, 2016

PBL - Project Management Made Easier with Trello


A while back I posted some ideas on how to keep the students on track during a PBL run (PBL - Avoiding the pitfalls of "Doing Research"). I've been working with several iterations of the Project Timetable, Daily Project Work Report and Project Management Sheet with some success, but my students and I still struggle with some of the finer points of PBL management in the classroom.

You see, some of my students hear project and immediately jump up to get scissors and glue, while others get a computer and open Google slides. Often I find myself saying, "You don't even know what the project is about and you are already thinking about the final product?" So the question continues, "How can I help students visualize the steps needed to successfully complete a project run without micro-managing?", and more importantly, "How can I see where everyone is at any given time?" I think I may have found the answer in Trello.

Trello is a free project management tool. The interface is simple. You create a board, which is really a list of lists, filled with cards. The cards can include pictures, attachments, checklists, labels and due dates. These cards can be moved around and edited all members of a board. Basically anything that you would need to know about a project run can be added to the board.

Here is how I am using it for my PBL runs:

  1. I create an assignment board master and make it public. The master includes the assignment, specific links I want to share, expected due dates, etc. 
  2. The "press secretary" from each team creates a copy my board master, and shares it with his/her teammates and myself.
  3. As students work on the project run, they update the board, moving the cards from "To do" to "Doing" to "Done", and add the evidence of their work. They can add links, pictures, documents, you name it!
  4. Things in the  "Done" list can be opened  by me to provide feedback. I can  even move things back to the "Doing" for revision. The board is updated in real time, so any time anything happens the students have the "latest" information.


Trello does not have to be only for PBL. Read what Melanie Pinola has to say about Trello. And no, I am not affiliated with Trello in any way. It simply has allowed me and my students to become better at this PBL business.

Sunday, April 10, 2016

The End is Nigh


The end of the school year is upon us. Students are dreaming about that long summer vacation. Behaviour issues are on the rise. You are asking yourself, what can I do to keep students engaged? How can I recap what was learned and end my school year strong?

Below are some of the assignments that I use:


I would love to add to these. What are some of the things you do to keep your students learning until the last day?

Saturday, April 9, 2016

StunConference - A Student Led Unconference


If you are an educator you have probably have heard of un-conferences. Maybe you have even attended a couple. You might have even toyed with the idea of doing one with students, especially if you are a project based teacher. After all, they kind of feel a little like the "need to know" discussions you have after your entry event.

However, the logistics  seem daunting. Where are you going to hold it? How are you going to keep students on track? Do you really have the time? What if the students do not buy into it? What if a session creator gets no participants? These are the questions that good friends and masterful educators Samantha McMillan and Melissa Garcia had a couple of months ago when they decided to "Just do it". Today, I was in Samantha's class and witnessed what I had thought impossible: A 6th grade student led un-conference.

So, what did it look like? Engagement and deep conversation centered around "Imagine the Future". All students were:
- Participating
- On task
- Holding each other accountable
- Learning from each other
It was a teacher's dream.

Now for the tricky part. How do you achieve this?

Your break-out sessions do not need to be separated by walls. Student led un-conferences can be done in a regular classroom. You just need to have students sit together. It will get loud, but not much louder than in any group activity.

Decide on an un-topic conference appropriate for the students. It should be broad enough and interesting to the students. Start with a topic that inspires conversation: Imagine the Future (today's topic), College, Immigration, Equality. You know, the small stuff.
 
Provide students with some time (whether in class or out) to come up with break-out session ideas. Have the "Session Wall" posted for a couple of days at least. It does not have to be fancy, some butcher paper and post-its will do. Make sure you emphasize that not all students need to create a session. Have them read the session wall before adding topics. Remind them that if they want to lead a session that is already posted they can simply participate.

Prepare the students. Explain the structure. Go over the norms. Emphasize collaboration. Here is the website Samantha used with her students for today's topic: StunConferenceAdVENTURE (Be aware that some of her links are specific to her class, so they will not work for you).
With her permission, I have tweaked it into a generic one that you can use in your class, with specific ties to PBL - to make your own copy of the documents open them in Google drive and click File>make a copy. 


The day of the un-conference, take a deep breath and step back. Visit the different break-out sessions as a participant. Above all, avoid taking over. Trust your students and see them soar.


If you are wondering about the electronics, that is where their note-taking documents are.
I invite you to try it out. You will not be disappointed. If you do, tweet it out using #StunConference. 

Sunday, March 27, 2016

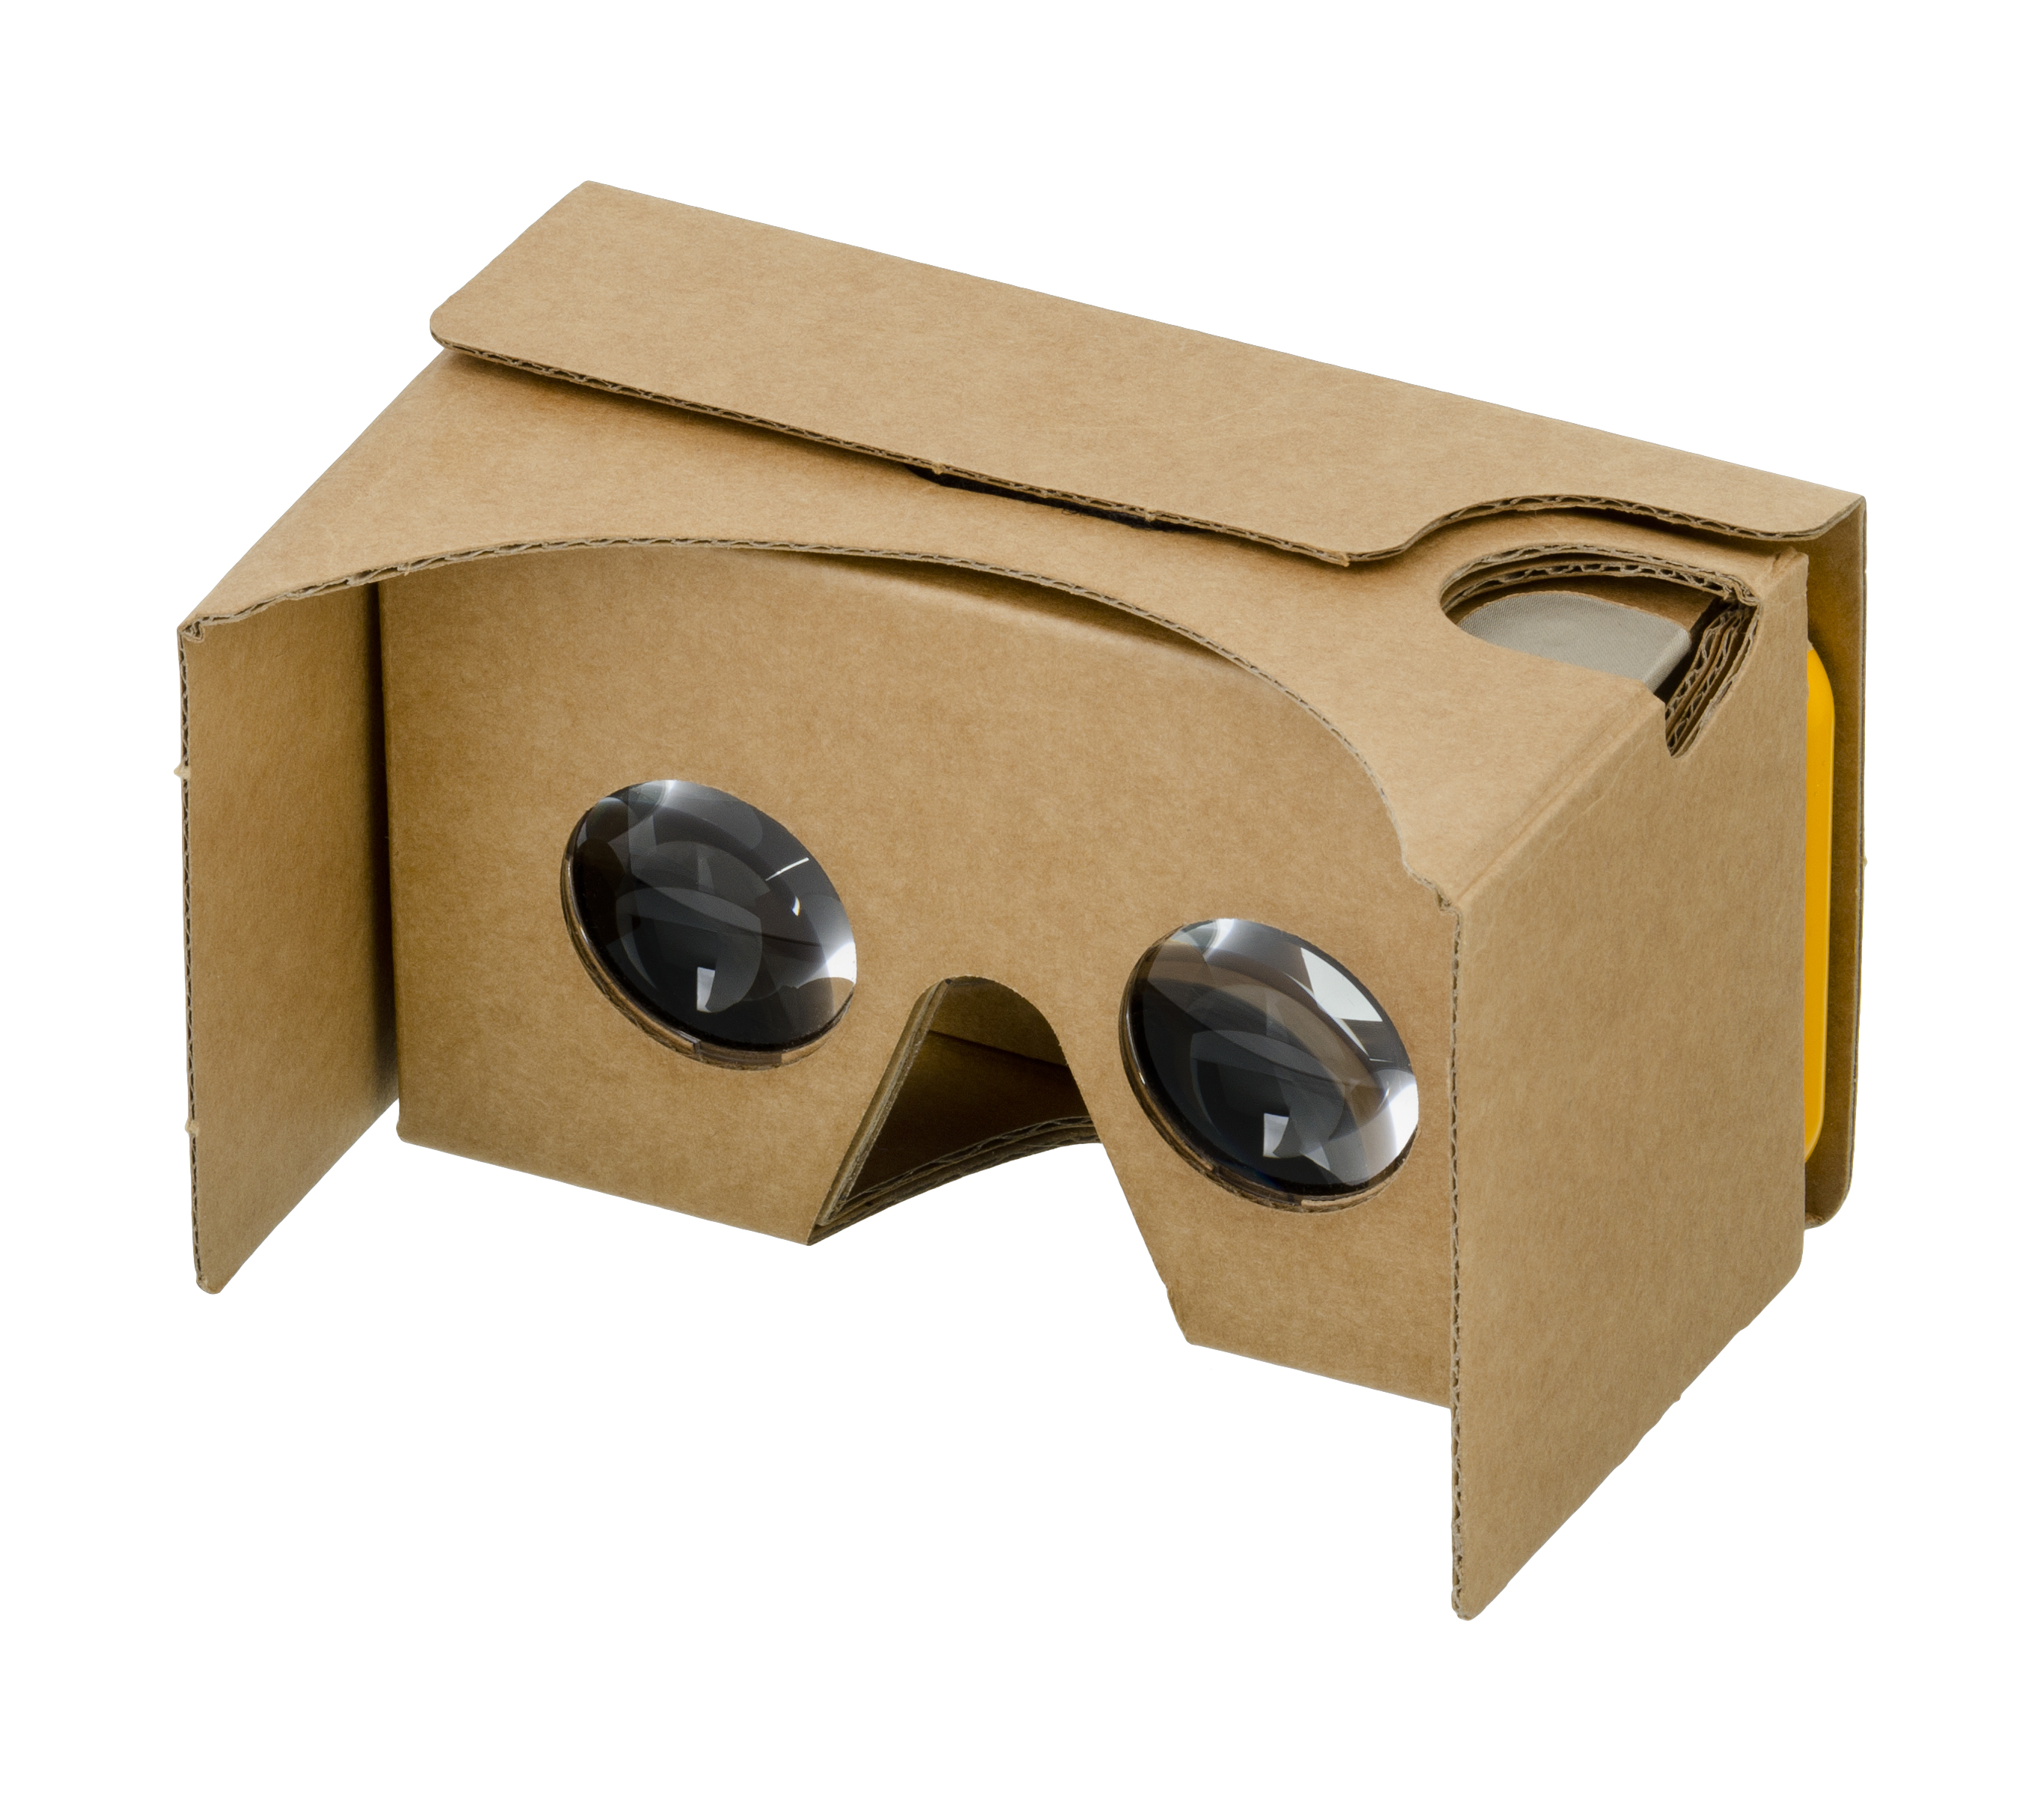
Appsmash: Google cardboard +Tinkercad+Sketchfab


I am going to be totally honest here. When I first heard about Google Cardboard I figured that this was not for me. What could this contraption actually provide for my students that a video could not do? However, all that changed for me while attending the DeeperLearning Conference and landing, almost by mistake, in Carrie Lawrence's "Virtual Reality in Education using Google Cardboard" workshop.

We started with what I thought Google Cardboard was all about. Giving access to far away or impossible places that are now at our student's fingertips. Having never done the VR thing, that in itself was actually quite fun, and the apps she shared were cool. Here are some of the sites she shared and a couple more that I found after the session (all for Android, but I'm sure you can find the same or similar ones in the Apple store). Disclaimer, several of these work better on some devices than others, but don't let that deter you; find one or two that work for your device. Many more are being published.


VR Apps (Android), by mrsgarciaserrato

Now, if you have read my blog before, you know that I am more of a "student create stuff" kind of teacher. I liked the idea, but I was still not particularly enthused. However all of that changed an instant later when she began talking about 3D modeling. You see, there are a couple of tools that when used together enable students to create VR 3D models. This is how it goes:

It starts by you assigning a project that results in a digital 3D model. For example, my eco-house project.


Your students create their model in Tinkercad. This would be my go to since it is free, but I am assuming that other options would work (SketchUp or Minecraft). The limitation is really that the "output" needs to be compatible with our next step.
If using Tinkercad, once your students are done, they would click on Download for 3D printing, and select either .STL, .OBJ or .VRML.


That was the hard part. The next step is simply to upload the file to Sketchfab.


The students can tinker with it some, following these helpful tips from Sketchfab so the VR experience they create is "just right".

And just like that, the students, their parents and yourself can now use Google cardboard to virtually walk all around their model!


Google cardboard can be bought for around $10.00 from Google or Amazon (search for Google cardboard), and they work with any smartphone and even iPod touch devices. Students will also need to create accounts in both Tinkercad and Sketchfab (both free), but check with your IT first to verify that they are whitelisted.


Two additional "mini-hacks" before I go:

- Add a rubber band to the "crease" where the phone goes to prevent it from slipping out.
- Make sure you take the phone out of its case. This allows the use of the "trigger".


Get your "Google Cardboard" on!

Thursday, March 17, 2016

Is it cross-curricular?

Image: http://www.idiagram.com/ideas/knowledge_integration.html


I was in a PD the other day, and we were asked to provide examples of units that were cross-curricular. A couple of teachers started sharing how this particular math lesson was cross-curricular because the students were reading an article. Other teachers shared lessons that specifically said "cross-curricular integration" and used fancy fonts and colors to identify cross-curricular connections. I started thinking, all this is fine and good, but is something really cross-curricular simply because we added a reading? Is a science lesson on density cross-curricular because the students use math skills to arrive at an answer or perhaps included a couple of graphs? If students draw pictures or build dioramas, can I check off the "art" box?

By now, you have probably figured out that my answer is no. This is simply adding stuff. Even if during a science lesson we claim things like students provided textual evidence for their answers, thus "This lesson addresses CCSS.ELA-LITERACY.RI.6.1 Cite textual evidence to support analysis of what the text says explicitly as well as inferences drawn from the text.", unless the skill was specifically taught and assessed as part of the lesson, we cannot say the lesson cross-curricular (or integrated) Science and ELA. It seems really like a happy coincidence. 

So then, what do we mean by cross-curricular integration? A lesson, or unit that is:
  • Based on individual subjects, and their specific standards.
  • Developed by individual teachers, with excellent subject knowledge, working together to connect different subject matters in authentic and explicit ways.
  • Requires sustained collaboration between all participating content area teachers. Not only is pacing of content delivery necessary, but also the teachers involved need to have a relatively deep conceptual understanding of the different subjects being addressed. Going back to our previous example, the science teacher must know just how the "citing of textual evidence" looks like and is taught, while the ELA teacher must be able to explain photosynthesis using the same language as was used in the science classroom.
  • Provides opportunities for students to develop one end product that demonstrates mastery of the content in all the subjects that were considered as integrated. This means for example, that the essay assigned in Language Arts is assessed for craft and structure by said department, but for concept mastery in Science.
In short, cross-curricular integration requires work. This is not something we can do by simply "tweaking" and adding a couple of standards to the list. Let's provide the time for teachers to really develop cross-curricular units. Let's embrace PBL and provide students ways to demonstrate mastery in meaningful ways. The students will reap the benefits!

Saturday, February 6, 2016

App Smashing - Hstry and Thinglink and Tackk, Oh My!


App Smashing began well before the term was coined. You might remember way back, when you created your first website (or really any digital product), and you decided to try to embed a video and then asked yourself, "How can I add some questions for my students to answer?" Perhaps you gave them a paper worksheet, or if you were a bit more adventurous, you might have added the questions directly to your site. Now you had the "problem" of collecting papers, so maybe you embedded a Google form.

As new tools became available you found yourself adding them to your repertoire, and sharing them with your students. Before long, you had your students creating rich multimedia projects and portfolios that included all sorts of cool things, from word clouds to interactive images. You had in fact taught them how to App Smash and you did not even know it...


What is App Smashing?

App smashing as defined by Greg Kulowiec (@gregkulowiecon Twitter) is the process of using multiple apps in conjunction with one another to complete a final task or project.

Why App Smash?

Even with all the options available to us, there is rarely one tool that can do everything you need/want. App Smashing demands creative thinking, making the issue of not having the "perfect app" into a positive. It allows you and your students to take a topic as far as it can be taken, providing opportunities to create engaging learning products. Most importantly, App Smashing is plain fun.

Let me share with you an example. This is a Tackk + Thinglink + wizerme + edpuzzle  + lessonpaths + blendspace + Youtube, in which the students will end up responding to a Wix by using Hstry. I know, it is probably too much, but I wanted to show you just how far you can take things. 


App Smashing Rules

https://goo.gl/Gni2Bl


There are really no rules. It is really about choosing what you (or your students) consider the best tool for the job. App smashing is really about pushing yourself out of the ordinary, and teaching your students to use technology as a tool to increase their learning.


My Favorite App Smashing Tools in no particular order


Mrs. Garcia's Classroom Webtools, by mrsgarciaserrato


Are you ready to App Smash?


For more on App Smashing, particularly with students, visit K12tecnology

Saturday, December 19, 2015

Edmodo Spotlight - The Gem You Have Not Heard About


A long while ago, I talked about Edmodo -  an educational website that takes the ideas of a social network and refines them and makes them appropriate for a classroom. If you have not heard about it, I invite you to read about its benefits and how I use it in my classroom. (Edmodo at AdVENTURE). 

What you might not know is that they recently came up with the idea of Edmodo Spotlight, a place where teachers have come together to share, collect and discover resources. I know what you are thinking, "There are lots of sites where you can find lessons or ideas" or "I can find what I need on ____". While this is true, Spotlight is different in that it can become your one place not only for inspiration, but also the place to find that quick sub plan, or discover new tools. Teachers from all over the world are adding content daily, and if you are like me, you will always look for ways to "make that lesson better". Edmodo Spotlight can help you do just that!

Let me give you some examples. In the past month on Edmodo Spotlight I:

Would I have been able to do all of this without Edmodo Spotlight? Maybe, but Spotlight made it so much easier!

To access Edmodo Spotlight, simply log on to your Edmodo account, then click on the spotlight (top right), and click on "Check it out":