Showing posts with label student engagement. Show all posts

Sunday, February 10, 2019

Foldables or what to do when there are no devices allowed

I am sure that many of you are familiar with the foldable idea. There are books and blogs specifically dedicated to them, and the whole interactive notebook movement is still making the rounds. Although I love the idea, I am more of an #edtech teacher and tend to prefer to find opportunities for students to create digitally. That is until I am absent from the classroom, and I need to find an activity that ties into what we are doing and that will not need the use of devices. Too many times I've been burned by either my sub not knowing the rules of using tech with students or my students taking that absence as an opportunity to be off-task on their devices under the guise of "doing research".

So for those times, I find that foldables are "just right" in that they allow for a bit of scaffolding, but they are easy enough for students to handle without my presence. Unfortunately, every time I need one and do a Google search, I end up with several Pinterest hits that lead to TpT - a site that I prefer to avoid.

Today was one of those days, which spurred the idea of sharing the one that I created this morning for human body systems, along with some others, in case you are in need of them.


Saturday, November 10, 2018

Five ways to use Pop-ups


A couple of days ago, @JakeMillerTech posted a way to create a pop-up window on Google Docs.
I was intrigued by the idea, especially after a couple of messages back and forth with Jake and @dyerksjr1 revealed that even with the "must be editor of the document" limitation, it could work via Google Classroom using the create a copy for each student and insert "from Drive" options (link). So I set about finding out whether you could include links, change fonts, add images (not just emojis), etc. Two frustrating days later, it dawned on me that I've never seen these kinds of adjustments on Google's actual pop-ups, so while I still have hope that it perhaps can be done, I instead changed my focus to what I could use the pop-up idea for.

So let's start by referencing Jake's original post "Add a Popup Message to your Google Docs", where he provides step by step instructions on how to add the code to your document.

The code for a Google doc is:
function onOpen() {DocumentApp.getUi().alert(<head> "insert your message here" </head>)}
If you would like to add to Slides instead, you would use:
function onOpen() {SlidesApp.getUi().alert(<head> "insert your message here" </head>)}
and for Sheets, well:
function onOpen() {SpreadsheetApp.getUi().alert(<head> "insert your message here" </head>)}
With that out of the way, it is time to have some fun and think of ways of using it:

1. Reminders:


2. Provide links: Although the link itself will not work, students can always copy/paste it:

3. Give words of encouragement:
If you do not mind a little extra work, you can even provide individual pop-ups or even chose only a couple of random or carefully selected students for whom the pop-up appears.

4. Provide hints in a Break-out Edu activity:

5. In a gamified environment, perhaps even provide some hints about Easter Eggs. 

I'm sure you can think of some other awesome uses, and if so inclined tell us about them in the comments.

Thank you @JakeMillerTech and @dyerksjr1 for teaching me about this fun addition to my teaching arsenal.

Saturday, November 3, 2018

Collaborative Annotations Using Scrible


Book annotation 2 by Katherine Stone

As many of you may have experienced in your own educational journey, at some point I was taught about annotating what I read. The mighty highlighter made its appearance in every school supply list my mother received, and much like you see above, I gleefully used it to mark pretty much everything I was allowed to. As the years progressed the highlighter slowly disappeared and the annotations instead made heavy use of the marvel of Post-Its which gave me the advantage of being able to write something along the text and not simply marking things that my young self considered "important".

At some point in my career as an educator, I was introduced to the idea of close reading, and with it came a whole new way of marking text that I was expected to teach my students. Colors and specific markings were the norm and while I am not against close reading or increasing student understanding of text (What is annotating and why is it an essential skill to close reading?), the idea of having my students have to follow a specific format and key made it seem more like busy work, akin to my highlighter overuse.

The questions I asked myself throughout the close reading professional development were:

  • After all of this, will the student ever go back and use all those notes for something other than answering a couple of questions? 
  • Will they ever remember that that particular document had some important notes that could be used later for something else? 
  • What about all the reading we now do online? Am I really going to print out all their research so they can use this?
  • What about using collaborative close reading, especially in my PBL classroom where students are often reading a relatively dense scientific text? Shouldn't there be a way for students to close read together?
All of these questions can be answered with just one "magical" digital annotation tool -  Scrible. Let me explain...

A couple of years ago, I developed a project for my 6th graders on Climate Change. The idea was that the students would choose a topic from a list, interact with several digital resources from places like the EPA and the NCA and collaboratively develop a product to educate others about the impact of climate change. Par for the course, except that many of them were overwhelmed by the amount of reading and synthesizing they had to do. Add to that that they had to share their thoughts on the reading with each other and organize all of the information and ideas into one cohesive product, all the hallmarks of chaos leading to disengagement.  That is when Scrible, a free tool, makes its entrance.

Scrible makes the possibility of collaborative digital annotations a reality! The only thing students have to do is create an account (using their district e-mail). Once that is done, a student can use the tool on any webpage sharing their thoughts right next to the text they highlight. If they create and share a permalink, they can also annotate collaboratively, which means other students can join a conversation about that digital text; this can take the form of questions, responses, comments and even links to other corroborating sources.


At first, students used the tool simply to remind themselves of the information, stating simply that "this information is important". However, as they progressed, and with some prodding on my part (adding cryptic replies such as "why?"), they started adding a more thorough commentary, and even inserting links that corroborated what they were reading. These annotations then allowed them not only to record their thinking but also to organize their thoughts in preparation for their project work. They served as reminders of key concepts and lateral readings they had done as they interacted with the resources. Since they were sharing the reading and annotating load, all the students were happy to add to what was being said instead of that solo "this is too much" mentality that we had before the use of the tool.

What is even more perfect, is that as long as you are logged on, the tool will keep track of the web pages you have visited and their annotations. This came into play for us when the students used pages they had annotated for the climate change project several months after the fact to support some of their building choices in their disaster-proof housing project during our human impacts unit. 

However, the best indication that the tool worked for my students was when I discovered it being used, without prompting, by former students. When I asked them why, they shared that it made their work easier since they could talk to each other about what they were reading, saving them time and allowing for everyone to join even if they were not in the same room. That, in itself, is a win for me.


There are a couple of Scrible tutorials on Youtube in case you need help signing up and using it:


It is worth noting that you can use Scrible on pdf's and "published to the web" Google documents, saving you the time and cost of printing resources you may already have to share with students.

I invite you to start playing with Scrible and share a comment telling us how it went. Until next time.

Tuesday, August 7, 2018

Beat the Teacher - Back to School Edition


On many occasions during the game-based learning and gamification Tweeter chats I participate in, we've talked about game skins (#games4ed, #XPLAP). For those of you that may be unfamiliar with the term, a game skin is a cosmetic change to a game that does not change the basic gameplay. Much like what I shared when I talked about my FLUXX Mod project, or what @MrPowley shared in his Skin in the Game post the idea is not to create a new game from scratch, but simply to change the topic of the game adapting it to specific situations.

As I was going through my collection of board games thinking about what I could do to start the 2018/2019 school year I happened upon the Spin Master game called "Beat the Parents". As I remembered, the gameplay was pretty easy, but being a full-on trivia game it did not make my family's game-night rotation too often. However, after dusting it off, I figured that it would be perfect to mod as a Back to School game, giving my class the opportunity to review expectations, policies, procedures, and locations of classroom items, while allowing me to get to know my student's trivia and preferences.


Thus, I started by creating the board (click to open the file), which I plan to project to the class, using post-its as tokens (mover pieces) so that the whole class can play at once.
Normally, I would have created and laminated the necessary cards, but I decided against it for this skin since I want the students to come up with their individual "getting to know you" trivia questions. The plan is to provide each student in my 5 periods with a couple of index cards where they can write questions like "What is my (the student's) preferred nickname?", "How many siblings do I have?" or "What is my preferred sport/book/content area?", really anything that would be traditionally asked in a student interest survey. On the other hand, I prepared a file with the teacher questions that are specific to my class (sharing to give you ideas in case you also want to try this out).

Since I was not going to create physical cards, I then had to figure out a way to create digital wild-cards. These became the numbers 1-20 at the top and bottom of the board you see above, and the plan is that when we land on a wild card, I will roll a 20 sided dice and click on the corresponding card. The wild cards linked on the board are simply links to individual slides in this slide deck.


I tried to make the wildcards somewhat generic, but if you find that they are too specific or you are interested in creating your own set, just remember that you can obtain the links to individual slides in any slide deck as explained here.

The gameplay itself is exactly as the original (Beat the Parents instructions), except that there will always be only one question per turn (in the original there are up to three). The game is so easy to play that once you have the board, you can have students create questions for a topic at any point during the school year for an impromptu review and quick game of Beat the Teacher.

While I am certain that the students will beat me when I present this as part of my getting to know you activities, before knowing the new students very well or at all, I think they will get a kick out of beating the teacher, and who knows, maybe I'll surprise them.

Thursday, July 12, 2018

Appsmash your narrative


One of the biggest struggles I've had in the whole gamification business has been the narrative aspect of the gamified classroom. As many before me have suggested, a good narrative engages the students and helps drive the game forward. (The importance of narrative in the student-centered classroom - Adam Powley). The narrative gives meaning to the whole idea of why we are collecting points and/or struggling to reach the top of a leaderboard.

As my games have evolved through the years, I've used different themes and attempts at narratives. We've trained dragons, explored idyllic islands and even survived a zombie apocalypse, however, in all of these my narrative has been a secondary consideration, mainly due to not having figured out a way to deliver that narrative consistently. In fact, it was not until the end of the zombie apocalypse (last year) that I re-discovered the mini-videos I had created to accompany the original narrative. In the day to day business of teaching they had been left behind and by then my students had lost interest in the story they had pushed for when we started. They saw the leaderboard and acquisition of privileges as the only end goal of the game, and though this was enough for some of them, for others it became nothing more than "regular" school with a few bells added.

In an effort to remedy this, I started looking for ways to have everything I needed to move the story forward from the beginning. Now, this meant that I needed not only a changeable storyline, a place to hold everything, and a way to hold myself accountable (lest I forget again) but at the same time keep the story hidden from students with enough crumbs so that if I did forget they would ask about it.

The changeable storyline was easy. I had already decided that we would be space explorers giving me the ability to add or remove planets to explore through the different units I teach. Star Trek and its "continuing mission" being the obvious choice for this. You land on a planet, meet a new civilization perhaps capture a couple of aliens in our Boss Battles, and on to the next one. Best part, you can always revisit a planet or remain there longer if needed. With this in mind, and using LunaPic (as illustrated by Mr. Powley in his ClassroomPowerUps blog), I started a Google slide deck to house the complete story. Each slide is a mission log, has a quick recap of events and hints at what's coming next as the ship moves through its assigned sector. The idea is that it would read like a serial comic book of sorts (or like the logs entered by the different captains in the series).


I was busy with this for a few days, but the main issue remained... How could I publish only the portions of the story that have been visited ("the story o far") while letting the students know that there is more to come. After much Googling, I found that there is no easy way to password protect only portions of a slide deck, there are many ways to prevent people from editing, but not from moving forward on a deck. That being the case, I transformed a slide into a Google drawing, and that was strike two. Not only can you not directly password protect the drawing, you cannot open it directly when published to the web, it will always be a download. Not being one to give up, I finally came across a handy tutorial appropriately called "How to Password Protect ANY File in Google Drive" from Flipped Classroom Tutorials, which uses Google Forms' response validation to ask for a password and deliver a link if correct. Although using this, I still had to have individual artifacts for each part of the story, at least now I could hide them in plain sight.


As it usually happens, I got distracted with something else and left this alone for a few days, as the back of my head considered where to house all of this in a way that would be consistent with the space narrative. I considered places like Deck Toys or Symbaloo's Learning Paths which would give this a "gamy" look, but I wanted an even more engaging feel to it that would also not require students to log in to read the logs (other than what they already had with Google). Serendipitously, I came across Roberto Fantini's VR Tour "Space conquest" on Thinglink 360. Now, if you've read my posts before you know that I avoid using paid for stuff, but I have Thinglink premium already so I took it as a sign that this should be an avenue to explore. So I finished up most of the narrative for one grade level (still debating whether we will come back to earth or not) and "remixed" the image to come up with this:


The first "hidden" part of the narrative is item 3, and in case you would like to see the story the passwords are:
3) hydrogen
4) lithium
5) sodium
6) potassium
7) rubidium
8) cesium
9) francium
10) beryllium

The added benefit of this is that I can also add Easter Eggs and links to directed side quests to the narrative slides, or add elements to the story as needed, which gives me the flexibility I was looking for in my narrative.

I am happy with this solution, but wonder whether there is a less time-intensive or totally free way. If you've found it, please share. In the meantime, I' still have to do this for three other grade levels :)

Tuesday, April 3, 2018

Digital Citizenship - #IronChef edition


A few days ago, @goformative shared @jcorippo's interview on Every Classroom Matters, "What I learned About Student Engagement from Watching TV". In it, he describes an interesting Iron Chef-inspired protocol he developed to modernize and re-energise the traditional jigsaw activity we learned about in our certification courses.

I immediately became intrigued by the idea, thinking not only of how I could use it in my Science class but also how useful it could be in other content areas. As I thought of the possibilities, I decided that a topic that would lend itself well to this protocol was our Digital Citizenship unit. For starters, my students receive this information from several teachers at the start of every school year, but as the year progresses they start "forgetting" about it and begin to copy/pasting material without proper attribution. They also, because they hear it from adults, often do not pay as close attention to it as they should. The more I thought about it, the more I became convinced that using this strategy would not only be beneficial at the start of a school year having the different groups present their 30-second slides and hearing the information over and over from each other, but also that I could, every month or so, have a random group present again as a refresher. Even better, as issues will inevitably arise with some of the content (oversharing, cyberbullying, plagiarism, etc.) I could call on those experts to once again present their Iron Chef work whenever it is appropriate.

With this idea in mind, I created three Iron Chef templates (going along with our school mantra "Respectful, Responsible and Safe).


For each of them, I also have a secret ingredient Flipgrid (made public), in which each of the experts will post their key takeaways, and that I am also envisioning using as a reference whenever only a specific group or student needs a private reminder.

As this is my first foray into this activity, I would find your comments useful. Have you tried something like this?

Saturday, February 10, 2018

Hyperdocs using Formative


Formative (which you may know it as goFormative) is a platform that allows you to create assignments, assessments, and homework for your students. It is easy to use and frees up your grading time with their automatic grading feature. Most importantly, and one of the reasons I love it, it allows you to see live responses and with just one click identify the areas of struggle or misconceptions for your students so you can quickly pull a small group or even address the whole class before they leave for the day.
10 Reasons Why Teachers Use Formative (Goformative.Com)

Their wide variety of embeddable items and question types, make it an easy fit for creating Hyperdocs. Let me show you what I mean by using my Forces Mastery Quest Hyperdoc


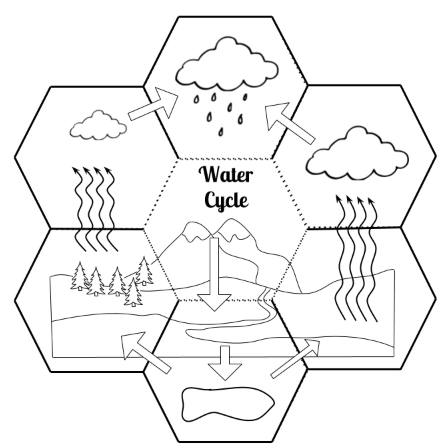
I start by creating a Google Docs clickable image (like the one you see above), making it embeddable in the same way as I explained in "Embedding a Google Drawing with Clickable Links". Remember that the beauty of doing it this way is that once generated, you can go ahead and change any and everything, modifying the background or adding more clickable items as you go along, even including some Easter eggs if you wish. All changes populate automatically to anywhere you embed the image to, including Formative.

Once I have my main image, and I obtain the embed code,  I add it to what I call a Mastery Quest Formative (MQF). This MQF also houses my summative assessment, which most often is automatically graded by Formative.
The instructions at the top let students know that in order to click on the image inside Formative they will need to right-click and open in a new tab or window.

I then create each of the Formatives that will house the documents, images and activities the students will need to interact and respond to. In this case:

Engage, which includes an embedded Flipgrid
Explore and Explain which houses embedded videos and readings, all with checks for understanding along the way
Apply, includes an embedded Phet simulator
Share, housing a gif image and a Padlet that allows students not only to respond but to vote on each other's responses.
I do not include a reflection piece since my students write reflective posts each week as a matter of course. However, the Extend portion is hidden away in one of the Easter eggs (the little blue bird you see on the top right), and I provide a hint to its existence at the end of the Share formative. There are two other Easter eggs that I embedded as quick surprises for the students.

As with many other Hyperdocs that you may have seen, it is the planning and finding the content that you want your students to see what will take up most of your time. If you have your links, adding them to your image and putting the Formative Hyperdoc together is rather quick.


You may be thinking of those things that do not have a readily accessible embed code, like Gizmos for example. There are several Embed Code Generators out there, which are super easy to use. That is what I used to generate the embed codes I used in this Cell Cycle Formative, which like the Hyperdocs we are talking about is a Formative composed of several Formatives.


Although not as easy as providing links and tasks on a Google doc or slides, the end product(s) is actually much easier to asses.

In traditional Hyperdocs, every student gets a copy and submits it in some way, but you still have to open up each individual student Hyperdoc to see what they are doing and provide feedback. On Formative, this time-consuming task is eliminated since you can see all students' work in the corresponding formative at once. Easy to see that most students are having trouble with question 2 (for example),  and address the problem immediately, or that everyone is on the right track, but that whole back table has not registered an answer on item 4, prompting a visit from you.You can even display the chart, hiding names of course, and discuss a particularly challenging question or task, switching to your own preview so that everyone sees exactly what you mean as you explain or discuss with the students.

For those of you that may have given Formative a try in the past and have some questions or are simply curious to learn more about it, there is a growing community of Formative educators that is ready to welcome you. Hope you can join.

Thursday, January 18, 2018

Easter Eggs with Mini-Game Creators


In recent conversations with my gamification PLN, the use of Easter Eggs has come up. As a non-videogame gamer, I was unfamiliar with the term. Doing some digging I came across this Storify of #XPLAP's chat published in @MrMatera's blog. With a little bit more knowledge, and after talking with my personal source of all things gamer (my teenage son), I was ready to think about some ways that I could create Easter Eggs within my hyperdocs and project pages.

Hiding the Easter eggs is relatively easy. In a hyperdoc, you can simply type whatever you wish (perhaps a reminder to yourself of the title of what you linked) and hide it by making the font the same color as the background. In a project page, Google Drawing or Google Slide, you can insert a shape and make both the lines and background transparent, of course linking the shape to the website that hosts the Easter Egg.

Once the issue of how to hide Easter Eggs had been resolved, the question became what to hide. Of course, you can hide Youtube or Edpuzzle videos, links to websites, simulations, interactive sites or documents for the students to read and interact with. However, in true gamer fashion, I like to hide mini-games that are specific to the content and/or vocabulary the students are learning. That is where the mini-game creators come in.

Sugarcane  

This site from IXL Learning,  offers the possibility to create 18 game types from one data set. This means that once you have your content, in the form of text and/or images, you can reuse it, getting a new link each time. It has the added benefit of providing the students with points at the end of a game, which I then just add to my students' XP total giving an immediate incentive for playing the mini-game.


LearningApps  

At first glance not as pretty as Sugarcane, but LearningApps gives you more/different mini-game options (20 total, including hangman, cloze, group puzzle and crossword). It also gives you several options to embed your mini-game in other platforms, which for some may be a plus.


ReviewGameZone 

Much like the now defunct Zondle, you are able to create multiple choice review question sets that appear as part of a mini-game. You can link to a specific game or you can give students the link to the question set and have them choose which mini-game to play. Their games do require Flash, so you may want to check that out before creating your Easter Egg with them. Also important to know, the site now runs one ad at the top of the screen, which may be non-negotiable in some settings.


Quizlet 


This site has been around for a long time, so it is easy to find ready-made question sets. On the flip side, they only have a couple of "gamy" options (match and gravity), and some of their functionality is restricted (adding images and voice) requires that you upgrade to a Teacher account (currently $2.92/month)


Now, what does this look like in the end? Below is an "assignment page" that includes three Easter Eggs. Can you find them?

Any thoughts to share about how to create Easter Eggs? Leave a note in the comments.


Tuesday, December 26, 2017

More than a "Design your Own Board Game" Project

Link to Unit Plan

In a recent conversation, the subject of student-created games came up. As many before me, I've had students create games for a variety of reasons - to review the content, to demonstrate knowledge, etc.  However, often the products are nothing more than trivia games, where students go around the board they created answering questions. At best students craft a nice-looking "skin" for games like Trivial Pursuit or Beat the Parents, and at worst there are only boxes and questions in a quickly hand-drawn path. There is little challenge or replayability - as @MatthewFarber has been known to say, "chocolate covered broccoli".

This got me asking, "Where is the disconnect?"If all of my students have played games before, can quickly make decisions about whether a game is fun or not, and know that there will be a game tournament at the end, why is it that they rely so heavily on these types of games? Now, I know that one part of the answer is simply that they equate questions/answers with review. However, in my search for answers, it also became clear that they look at this type of assignment from the point of view of the consumer, not as designers of an experience.

At this point, I would like to clarify that I have never taken a course in game design myself, but with a willingness to learn, I embarked on my own quest to help my students become better at designing games. The assignment I am sharing with you is the end result of this experience.

Research

In this assignment, the research is not where students go over notes or textbooks looking for questions and answers, but rather where students learn about creating games. We start by investigating different board games and discuss what makes a game "good". This is also where I explicitly teach the parts of a game, including the need for goals, challenges, storylines and clear rules which will then make their end product interesting and replayable.

Prototype

One of the key parts of game development, which is often overlooked in "create a game" assignments. From carefully selecting a theme to presenting and playing a paper prototype with a focus group (consisting of other students), the goal is for the students to develop a well thought out game idea before committing to a final product. This is where students often realize that their game is really a non-game, just a pretty board with questions. Providing this opportunity to prototype, play-test and most importantly act on the feedback is a good way for students to develop critical thinking skills.

Final Design 

If the previous two sections were done successfully and allowed enough time for students to digest the information and feedback, this section is relatively easy to implement. The "hard thinking" is done and it is just a matter of crafting the product and making it look pretty. Skills to be practiced in this section include of course fine-motor skills (which even my middle-schoolers need to practice), and digital media creation (icons, game pieces, digital art and transforming hand-drawn art into digital formats). Although some of my most artistic students like to create their art by hand, I require them to digitize it ("If you wanted to create 50+ copies of your game your art would have to be easily reproducible").

Advertisement

Often some teams of students are ready to move on to our tournament day while other teams are still crafting or even prototyping, so I added the advertising section. This has not only the benefit of providing us with a time buffer, but also continues the "think like a designer" mindset, with the goal not only of creating a better game, but also to be able to market it adequately.

ISTE Standards (for students)

The beauty of this project is that it also allows your students to practice several of the ISTE standards for students. For example:
4a -Students know and use a deliberate design process for generating ideas, testing theories, creating innovative artifacts or solving authentic problems.
4c- Students develop, test and refine prototypes as part of a cyclical design process.
6a - Students choose the appropriate platforms and tools for meeting the desired objectives of their creation or communication.
6b -Students create original works or responsibly repurpose or remix digital resources into new creations.

Below you will find a small version of the board I created for students to access the complete assignment. If you would like the version that I share with my students click here. Almost all of the icons and text are clickable, opening the needed information and items students need to document their progress. On the student assignment page, you will also find a Teacher Corner button, which opens to a unit plan that may help you in implementing this with students.

Feel free to share with others who may find this useful.


Friday, December 8, 2017

Embedding - Generate your own iFrames


If you are like me, you use a variety of tools to share content with your students. Tools like goFormative, Wizer.me, Symbaloo learning paths, PowerMyLearning, DeckToys and even webpages you create on WIX or GoogleSites, are super useful in part because they allow you to embed content from other places. This means that your students "stay" on the same platform as they work on their assignment, lessening the risk of distractions from moving between platforms. The developers of most of the apps and simulations I add to these sites know that their content is shared on other platforms and they have made it easy by providing embed codes right on their platforms.

But what happens when you find something you really want to share but there is no embed code in sight? In the past, I would just add the link, and teach the students to navigate between several tabs. This is fine for most, but of course some would use this as an excuse to visit something else - that meme generator they've been itching to show off, for example.

After a bit of searching ways to create embed codes, I came across this easy to use iframe code generator

To use it, the only thing you need is the URL of the content/resource you are wanting to embed.

Once you have pasted the URL in place, you click on Generate, and presto your embeddable iFrame Code appears almost as if by magic.

Of course, if you wish, you can also play around with height width, adding scrollbars, borders, etc. (as I did on the "blob-in-blog" above).


Now, depending on where you are going to use that embed code, the only thing you have to worry about is whether the original site's URL is secure or not. Most of the educational sites that have embedding content options do require that the embedded link is "secure" - HTTPS and not just HTTP.

I have also shared this with my students, who blog for me every week and who sometimes create products using different edtech tools. They, in turn, publish their products by embedding them into their blogs.

I am sure there are other iframe generators out there. Have you found a different one that you like better? Share with us in the comment section.


Sunday, December 3, 2017

Countdown calendars using Thinglink


Although I recognize that not all my students celebrate the holidays the same way, for the past few years I've been creating advent calendars simply because I love the idea of having little treats that countdown to something. In the spirit of inclusion, I've also created Hannukah menorahs, but this still begs the question of what to do with students who do not celebrate in either of those ways.

        
Hour of Code Spotlight link                                                                                     Hanukkah Spotlight link

The more I thought about it, the more it became evident that I could use the same concept for a myriad of purposes. For example, we could countdown the days until the holiday break, or better yet countdown the days until "we meet again in 2018". It is all about inspiring students to continue learning every day.

Creating a digital calendar:

1. Open a blank Google drawing.
2. Add a background and images appropriate for the purpose. This could be holidays or not.
3. Add a table, and label with the calendar dates you want to include.
Here is my December 2017 version, if you would like a template.
4.  Click on File>Download as>jpeg image (it can also be a png).
5. Upload the image to Thinglink.
6. Start tagging your calendar with links, prompts, apps or games. Whatever you want to share with your students.

Repurposing your image, unfortunately, requires that you follow the process again, but once you have the tags it is easy to simply copy/paste the links into your new image. For example, here is my 2017 PD Advent calendar repurposed as a Winter Break calendar.


                             Advent PD Spotlight link 

Different feel, but still fun.

Now, if free forming is more your style, you can also choose to go that route as I did in these EdTech and Science Games Holiday-themed images.

   
Edtech Spotlight link                                                                                                Science Games Spotlight Link

Although these are all holiday/winter themed, countdown calendars can also be used to launch a unit of study or review activities until a test. If you gamify, you can use them as we are reaching a boss battle or the end of a game chapter. The possibilities are endless!

Feel free to share how you have used countdown calendars in your classroom. I'd love to share ideas.

Wednesday, November 1, 2017

A Chemical Bonding Lesson with Old-School Manipulatives


For many years, I have been using ACS's "Middle School Chemistry" as my main curriculum to teach chemistry concepts in my middle school classroom. I love the simplicity and ease with which these lessons can be used in a classroom that does not have a traditional lab set-up. I have also always felt very confident with the knowledge gained by my students through the use of this curriculum. However, this year, as I was moving along in the unit, I came to the realization that this particular crop of students was very comfortable reciting answers without much in the way of understanding.

This was especially apparent when it came to bonding. In our assessment, my students were able to recite the difference between covalent and ionic bonding, but as soon as the question required even an iota of critical thinking, they were completely lost. Mind you, this is middle school chemistry, and I know that many of these students are not particularly interested at this point in pursuing chemistry careers, but I still felt an obligation to ensure that they could do more than simply recite information.

So, I set about trying to find some way for the students to gain that conceptual understanding of bonding that I saw as lacking. During these explorations, I came across a couple of good things that students could do in a virtual space - the ChemThink tutorials for example. These were good, but a little too much for middle school. As I continued to look for something that students could manipulate I found an awesome SEP lesson titled "Exploring Chemical Bonding", and that is when it became clear. If students could actually manipulate those valence electrons, perhaps they would finally move beyond stating "covalent bonds form when non-metals share electrons", and actually be able to explain why.

I modified the SEP lesson templates (simply to add color to the valence electrons so that students would not lose track of what they had) and  dedicated one full Saturday (and over 500 brass fasteners) to creating 9 sets of atoms. I also created a sheet to go along with the manipulatives that would help guide students through the task. Here is a link to the adapted lesson plan.


With all of this in place, Tuesday morning I finally taught the lesson, and was overwhelmed by the engagement and results. Although the students did struggle a bit to finally figure it out and at times I felt like a spinning top as I tried to listen in on all the conversations that were happening, having these old-school manipulatives helped my students visualize exactly what was needed for the different types of bonds to form. Physically moving electrons created the opportunity for actual discovery of concepts in a way that no computer simulation had been able to achieve. Even though creating all of those atoms took a lot more time than many teachers usually have, I highly recommend spending that time. Your students will reap the benefits of handling your "old school" manipulatives!