Showing posts with label PBL. Show all posts

Tuesday, April 3, 2018

Digital Citizenship - #IronChef edition


A few days ago, @goformative shared @jcorippo's interview on Every Classroom Matters, "What I learned About Student Engagement from Watching TV". In it, he describes an interesting Iron Chef-inspired protocol he developed to modernize and re-energise the traditional jigsaw activity we learned about in our certification courses.

I immediately became intrigued by the idea, thinking not only of how I could use it in my Science class but also how useful it could be in other content areas. As I thought of the possibilities, I decided that a topic that would lend itself well to this protocol was our Digital Citizenship unit. For starters, my students receive this information from several teachers at the start of every school year, but as the year progresses they start "forgetting" about it and begin to copy/pasting material without proper attribution. They also, because they hear it from adults, often do not pay as close attention to it as they should. The more I thought about it, the more I became convinced that using this strategy would not only be beneficial at the start of a school year having the different groups present their 30-second slides and hearing the information over and over from each other, but also that I could, every month or so, have a random group present again as a refresher. Even better, as issues will inevitably arise with some of the content (oversharing, cyberbullying, plagiarism, etc.) I could call on those experts to once again present their Iron Chef work whenever it is appropriate.

With this idea in mind, I created three Iron Chef templates (going along with our school mantra "Respectful, Responsible and Safe).


For each of them, I also have a secret ingredient Flipgrid (made public), in which each of the experts will post their key takeaways, and that I am also envisioning using as a reference whenever only a specific group or student needs a private reminder.

As this is my first foray into this activity, I would find your comments useful. Have you tried something like this?

Tuesday, December 26, 2017

More than a "Design your Own Board Game" Project

Link to Unit Plan

In a recent conversation, the subject of student-created games came up. As many before me, I've had students create games for a variety of reasons - to review the content, to demonstrate knowledge, etc.  However, often the products are nothing more than trivia games, where students go around the board they created answering questions. At best students craft a nice-looking "skin" for games like Trivial Pursuit or Beat the Parents, and at worst there are only boxes and questions in a quickly hand-drawn path. There is little challenge or replayability - as @MatthewFarber has been known to say, "chocolate covered broccoli".

This got me asking, "Where is the disconnect?"If all of my students have played games before, can quickly make decisions about whether a game is fun or not, and know that there will be a game tournament at the end, why is it that they rely so heavily on these types of games? Now, I know that one part of the answer is simply that they equate questions/answers with review. However, in my search for answers, it also became clear that they look at this type of assignment from the point of view of the consumer, not as designers of an experience.

At this point, I would like to clarify that I have never taken a course in game design myself, but with a willingness to learn, I embarked on my own quest to help my students become better at designing games. The assignment I am sharing with you is the end result of this experience.

Research

In this assignment, the research is not where students go over notes or textbooks looking for questions and answers, but rather where students learn about creating games. We start by investigating different board games and discuss what makes a game "good". This is also where I explicitly teach the parts of a game, including the need for goals, challenges, storylines and clear rules which will then make their end product interesting and replayable.

Prototype

One of the key parts of game development, which is often overlooked in "create a game" assignments. From carefully selecting a theme to presenting and playing a paper prototype with a focus group (consisting of other students), the goal is for the students to develop a well thought out game idea before committing to a final product. This is where students often realize that their game is really a non-game, just a pretty board with questions. Providing this opportunity to prototype, play-test and most importantly act on the feedback is a good way for students to develop critical thinking skills.

Final Design 

If the previous two sections were done successfully and allowed enough time for students to digest the information and feedback, this section is relatively easy to implement. The "hard thinking" is done and it is just a matter of crafting the product and making it look pretty. Skills to be practiced in this section include of course fine-motor skills (which even my middle-schoolers need to practice), and digital media creation (icons, game pieces, digital art and transforming hand-drawn art into digital formats). Although some of my most artistic students like to create their art by hand, I require them to digitize it ("If you wanted to create 50+ copies of your game your art would have to be easily reproducible").

Advertisement

Often some teams of students are ready to move on to our tournament day while other teams are still crafting or even prototyping, so I added the advertising section. This has not only the benefit of providing us with a time buffer, but also continues the "think like a designer" mindset, with the goal not only of creating a better game, but also to be able to market it adequately.

ISTE Standards (for students)

The beauty of this project is that it also allows your students to practice several of the ISTE standards for students. For example:
4a -Students know and use a deliberate design process for generating ideas, testing theories, creating innovative artifacts or solving authentic problems.
4c- Students develop, test and refine prototypes as part of a cyclical design process.
6a - Students choose the appropriate platforms and tools for meeting the desired objectives of their creation or communication.
6b -Students create original works or responsibly repurpose or remix digital resources into new creations.

Below you will find a small version of the board I created for students to access the complete assignment. If you would like the version that I share with my students click here. Almost all of the icons and text are clickable, opening the needed information and items students need to document their progress. On the student assignment page, you will also find a Teacher Corner button, which opens to a unit plan that may help you in implementing this with students.

Feel free to share with others who may find this useful.


Sunday, December 24, 2017

Embedding a Google Drawing with Clickable Links


I'll start this post by stating the obvious, the easiest way to create a drawing with clickable links/tags is to use Thinglink. This site has been my go-to for any type of image tagging and while I love all their possibilities, including adding custom icons and tagging 360 images, I recently had the issue of wanting to both create the image and the tags at the same time.

A little backstory. 

The culmination of my Interdependence of Organisms unit has my students creating blog posts for different organisms in the Amazonian rainforest where they write about how each organism has a specific role to fulfill in its environment. In class, we then use those posts to create a Google drawing of the food web with links to their work. Everything works great as long as you stay within Google Drawing. It is not until I tried to embed that tagged image the students created anywhere that I realized that those tags the students painstakingly created do not work!

In the past, I've always solved the problem using Thinglink.

But as I mentioned before, this has the "problem" of having to create the image first and then add the tags. In class, this does not always work for a variety of reasons. The most important being that the image is completely static. You cannot change anything on the actual image so the students cannot add any more arrows (or organisms) as they discover other relationships when they discuss their work. Since this is a collaborative end product, the permanence of the image does not work for my purposes.

The workaround

It is a little convoluted, and it requires a little risk-taking simply because of the unfamiliarity you may have with some of the steps, but bear with me. In the end, you will have created the code with working links that can be embedded on any site or platform.

1. Open up a Google drawing. Add your background and items, and tag to your heart's content. In case you do not know how to do this, Karen Ferguson's video does a great job of explaining this.

2. Once you and your students are "done", or even before if you wish, publish your drawing to the web (File>Publish to the web). It does not matter when you do this since any changes you make after the fact will be updated automatically, which is exactly what my students needed. Do not worry about the size or the code at all. You just need it to be "on the web".

3. Go to Google sites, and create a simple blank site. You can name this whatever you like, and edit the homepage to insert your google drawing.

4. Unclick "include border around Google drawing" and "include title". At this point, you will choose your height and width. I recommend setting both to the size of your actual drawing.

5. Save the Google site. This creates a version of the site, with your Google drawing that includes those pesky clickable links you were aiming for.

6. Once you have saved, right-click anywhere on the image and select inspect

7. For those of us not familiar with working with HTML or the developer tools, this is where it gets scary. But don't fret it is simply a matter of finding the code and copy/pasting it in three quick steps:

  1. On the tab that appears, select Elements. Find the code where you see <div id="sites-chrome-everything-scrollbar">, and click on it to expand it.
  2. Scroll down until you find  <div class = "sites-embed-border-off sites - embed"... style=width 800 (or other number) px;" and right click on that.
  3. Select edit as HTML (third option). A box within the space appears, filled with the code you are looking for! Select everything within that box, and copy it.


It should look something like this:
<div class="sites-embed-border-off sites-embed" style="width:600px;"><div class="sites-embed-object-title" style="display:none;">Interdependence Rainforest Blogs</div><div class="sites-embed-content sites-embed-type-sketchy"><iframe src="https://docs.google.com/drawings/d/1ELpo7S7a0htZsqckkHkEtaI3KMXORFPStvVZGnVzt_o/preview?authuser=0&amp;h=400&amp;hl=en&amp;w=600" width="600" height="400" title="Interdependence Rainforest Blogs" frameborder="0" id="811835776" allowfullscreen="true" mozallowfullscreen="true" webkitallowfullscreen="true"></iframe></div><div class="sites-embed-footer"><div class="sites-embed-footer-icon sites-sketchy-icon">&nbsp;</div><a href="https://docs.google.com/drawings/d/1ELpo7S7a0htZsqckkHkEtaI3KMXORFPStvVZGnVzt_o/edit?authuser=0" target="_blank">Open <i>Interdependence Rainforest Blogs</i></a></div></div>
8. Now you can go ahead and paste that full code anywhere that allows you to edit HTML embeds (Blogger, Wix, Weebly, Wordpress, Emaze to name a few) creating your tagged and clickable Google drawing. 

And not only that, any changes you make to the original image immediately populate anywhere you have embedded your image so your students can modify the drawing, adding and deleting elements and tags without any worry about going through the process again!

Additional benefits

Using this method for creating interactive images also has some other "unforeseen" benefits.
  • The students can be in total control of the creation process. Any CC0 image is fair game to be used as a background or for tagging purposes. Once you teach your students to crop things in shapes, they can create all sorts of icons without worrying about size limitations.
  • Recently my district blocked Thinglink for student use. I can share my tagged images with them, but they cannot create accounts themselves and use it to create their own. 
  • Thinglink is not set up to be collaborative, so even if my students went outside of our servers and created personal accounts, they cannot work on one image together. This often defeats my purposes for creating interactive images.
  • It is totally free. You only need access to the Google tools mentioned. Most districts nowadays have given students access to the Google suite, so anything they create using them will not need any paid upgrade of any kind.


I hope this is useful to you and your students, and please drop me a line in the comments section if you find an easier way to do this.

Saturday, November 4, 2017

FLUXX MOD Project - Board Games in the Classroom

Although I am not affiliated with FLUXX® (or Looney Labs) in any way, I think that FLUXX® is a great game that everyone should own.


We often think of board games as a staple for Family Fun Night, and because many of them help teach soft skills and facilitate higher order cognitive abilities, teachers routinely incorporate classics like Monopoly, Risk, Scrabble and Apples to Apples in their classrooms. By the same token, creating MODs or skins for existing games is a time-honored classroom activity. A simple Google search will bring up a plethora of "create your own board game" classroom projects. For those of us that have tried it, we see it as an opportunity to review content, both as the game is being created or modified and while the students play them during those extra-long rainy day recesses.

A couple of years ago, my own children introduced me to a great little game called FLUXX® - The card game with the ever-changing rules. The game was very easy to learn and portable which made it a staple for my family. Over the next few months, we purchased several versions happily bringing them out as part of our game repertoire.

Not long after that, I started toying with the idea of not only sharing it with my students but also having them create MODs for it to play in the classroom since the gameplay itself is based on reaching a goal of paired concepts. This makes it super efficient in helping the students revisit concepts, while at the same time allowing for some deeper thinking about the relationship between ideas. For example, in FLUXX's original version one of the goals is Rocket Science, which "needs" Rocket and Brain on the table to win.

After a little refining and tweaking of the idea, I set about creating a project page with directions, templates and of course a rubric for my middle school students. I introduced the project on a Monday, and gave them two weeks to come up with their skins.

Of course, there were some students that did not know what I was talking about, which made me realize that before anything else happened, we needed to play a couple games of FLUXX. After a couple of rounds, and some more clarifying of where to find the "big ideas" and how to keep track of their paired goals so they would not repeat them, I had them get into groups (of 4) and choose a topic for their MOD.

Students took to this creative form of review in a way I had seldom seen otherwise. They loved the idea of coming up "funny" titles for their goals and were seen scouring textbooks and notes to figure out how they could pair ideas that at first glance may not have been obvious. In one of my favorite examples, a group that developed a Newton Motion FLUXX Mod, included Robert Hooke as a creeper.
Here is the full set of "Newton Motion" cards in case you want an example for students:
I have run this project now several times, and I am always amazed not only at the cards they create but also by the enthusiasm that they show whenever I declare "it's review time", and bring out stacks of student-created FLUXX decks.

For obvious reasons all of my students' FLUXX decks are science related (Motion, Evolution, Genetics, Matter, etc.) However, I can easily see FLUXX decks for novel studies, American Revolution, and even Linear Equations. In case you missed it above and are interested, here is a link to the Instructions and Templates that I share with my students.

If you try this, let me know. I would love to know how it went for you and your students.

Friday, June 30, 2017

Professional Learning Networks

Image Source: http://www.quotehd.com/imagequotes/TopAuthors/pablo-picasso-quote-i-am-always-doing-things-i-cant-do-thats-how-i-get-to-do.jpg


I am quite often asked variations of the questions "How did you find that?". The truth is that I, personally, do not always "find that". The reality is that other people, my ever growing, active and remarkable reliable Professional Learning Network (PLN), are the ones truly responsible for the reputation I enjoy as an innovative educator. Because of my PLC, I've learned and then shared about gamification, hyperdocs, project-based learning, virtual reality uses in the classroom and so much more. This is my invitation to you to grow your own PLN.

What is a Professional Learning Network?

A PLN is your own personalized “network” of educators who share a common interest with you and is available to provide pointers, tips, and resources to you in order to help you explore that common interest is depth. This PLN goes beyond the teachers at your site or district, encompassing educators who you may not have met in person!

Why and How?

I was recently "challenged" by a member of my PLN to explain why a PLN is important and how do you grow one. This is what I came up with:


Where do I find educators to grow my PLN?

Most members of my PLC hail from three places:

  • Edmodo: You may be thinking, that is a learning platform for students. But for me, that has almost become a secondary use. Anytime I need pretty much anything I go to Edmodo and post in their topics or community streams. Educators from all over the world are there ready and willing to offer their insights. In this article, Edmodo explains how to use their platform as a PLN. 3 Steps to Creating Your Personal Learning Network (PLN).
  • Twitter: The dreaded words, social media, may be coming up in your head, raising all sorts of red flags. I was also very wary of it and did not even have an account until an Edmodo member of my PLC suggested I join a Twitter chat. WOW, that experience completely changed my perception of Twitter as a source of personalized learning. Education Twitter chats are happening almost every hour of the day! Anything you want to discuss, there's a Twitter chat for that. Just take a look at this calendar of education related chats - Chat Calendar. Once you join a chat, even if just to read the stream, you are sure to discover educators to follow. Here are a couple of suggestions from Edudemic, to which I would add @alicekeeler, @MatthewFarber, ‏‏@mpilakow‏, @mr_isaacs, @mrmatera, @legendlearning, @Ted_NSTA, @FredEnde, @legendlearning and‏ @carrierenfro, at least.
  • KQEDTeach: Relatively new, but so powerful. They are offering PD courses on demand to complete at your own pace. However, once you join you have access to all the other educators that are taking the courses, with a place to have threaded discussions. Basically, you learn together and continue the conversation within the platform. Who can say no to that?
I hope this post inspires you to grow your PLN beyond your site or district. As Pablo Picasso once said, "I am always doing things I can't do, that's how I get to do them". 


Saturday, December 31, 2016

We don't need badges, or do we?


When I started my gamification journey, one of the sore spots, if you will, was the awarding of badges. On the one hand, I agree with the ideas in Daniel Pink's Drive and the overjustification effect, and which translates into "Badges ruining intrinsic motivation to learn". On the other hand, I have a gamer son, who keeps going back to specific games in his collection simply because he wants to get that elusive gold badge just so he can show it off in his profile. So which is it?

As I continued to ponder the answer to this question, I participated in a couple of workshops and PD that offered badges that could be "added to my profile". I was surprised by my own drive to complete the activities, not really for the sake of learning, but because I wanted to show off the badges I had. Badges were giving me a sense of accomplishment and encouraged me to persevere, even when I got bored! If badges were doing this for me, why was I being so reluctant to add them to my classroom?

I began exploring different ways that other educators have used badges and came up with two reasons that if addressed would make me re-think the whole badging issue.

First, if I were to include badges, I had to make sure that the badges represented real achievement. One of my concerns with badging is that it can simply become a sticker chart. The idea that everyone gets a badge simply for showing up or participating in an activity takes away the value of the badges. Let's face it if the students know that they will get a badge simply for filling in boxes in an assignment, will they put any effort into making sure that their answers are correct? Probably not. However, if they know that they will only get the badge if they get a high enough score, then they may feel that the badge has some value attached to it. Even better, let's say that they did not get a high score in the badge assignment(s) the first time around. Will knowing that they can re-work the assignment giving them more than one opportunity to earn the badge, motivate them to keep at it, even if they think it is boring or not worth their time? I think it will.

Now, if this is the case, then I knew that I needed to be able to make my own badges. There are several online tools that allow us to do that. ClassbadgesCredly and OpenBadges come to mind. However, I prefer to fully create my own simply using GoogleDraw and clearly explained here by Alice Keeler.

Second, the whole idea of badges for me is that they must be public. Students will want to know, not only if they have the badge, but also who else in the classroom has it. That gamer sense of competition and being able to showcase achievement adds value to the badge. The tools mentioned before for creating the badges, also allow students to log in and view their badges. Now this would require students to create an account and/or log in with accounts that the teacher creates. That, for me, was a no go, and although I toyed with the idea of creating my own system using GoogleSheets, I decided against it (simply due to time constraints), when I came across Flippity.net's Badge Tracker. With a few tweaks, this tool allowed me to import the data of my existing leaderboard, use my own badges and embed it in my webpage for public viewing. All around win!

For now, I have decided on three types of badges:

Leveled Badges: These symbolize achievement in on-going assignments. Students will earn these badges by scoring well on their weekly writings and reading assignments.

Project Badges: These badges represent the skills and knowledge gained in a specific unit of study within the scope of science and engineering curriculum. 

Commitment Badges: These are badges awarded for achievement outside the leveled and project badges. What I envision here is, for example, a "Digital Citizenship" badge or a "Creative Commons" badge. 

So, what do you think about adding badges to your gamified classroom? I would love to hear your ideas.

Tuesday, June 28, 2016

Beyond the Leaderboard: Self-ranking charts


A couple of days ago, I talked about creating a multiple-class, self-ranking leaderboard. My students love the idea of being able to see where they rank, and compare themselves to one another, creating this competitive gaming environment that often leads them to perform and to keep working, simply to "outrank" one another. As I was updating my class website to include this new board, I started thinking about how to use the leaderboard as more than just a ranking system for the XP. Could I use it to inform students about how they are doing in different categories? Could I show the data in some way that would maintain the integrity of the leaderboard, but focus students' attention on opportunities for improvement as well? And almost as important, is there an easy way to do it; one that would not require much more than inputting values as the students grow? The answer turned out to be YES on all accounts.

Before I show you how, let me share the end products:

"I Need To Do More" chart


This first interactive chart, displays the totals for each XP category. As the year progresses, students can see how much each of the categories has impacted their XP totals. On their own, or with some help, they can decide to go back to assignments they may have missed or where they scored low XP and re-do/re-submit in order to up their total XP for that category. In my case, it could show an Aha moment akin to, "I have not done many of my blogs, if I do them now I can gain all those XP I missed".

"I Need To Do Better" chart


In this other format, the same data is displayed by average XP obtained in each category. When students see the data organized this way, they can quickly see areas where they can focus their efforts, to increase their standings.

The beauty of both of these charts is that they use the same Pivot Table I created for the self-ranking leaderboard, so not only do they update as soon as I input new values, they are also tied to the original ranking. The student order within the chart updates as well as they move up or down on the leaderboard, making it a "one-stop" responsive system that does not create more work for me to maintain or update.

The following video explains how to create the charts, and I am also sharing a template that you can use to draft your own.


Let the games begin!

Sunday, June 5, 2016

Simulations and the Gamified Classroom

The use of simulations in the classroom is a long-standing tradition. How else could we provide students with high end experiential learning, when our students seldom have access to anything other than basic scientific equipment, and in many cases not even that? If we want want our students to learn how to gather data, analyze it and come up with solutions grounded on evidence we need to provide them with the necessary tools, going beyond the simple inquiry that can be accomplished with household tools.

In the gamified science classroom, tech-based simulations are a handy tool to help us engage students in deep learning. Students can use simulations to develop and use models to predict outcomes. They provide them with data that is directly applicable and transferable to the gamified (and often real-life) scenarios that they are working in. Often, they have the advantage of already looking like a game, making it easy to assign them as part of your gamified experience.

The simulations best suited for a gamified classroom are interactive, animated, provide dynamic feedback, and allow for productive exploration. But, where do you find them?

PhET

PhET, created and maintained by the University of Colorado, Boulder, has hundreds of NGSS aligned simulations, complete with teaching resources. They have been working hard at converting all their sims to HTML, allowing access on any device. Not only that, they are constantly adding new sims.
PhET by NGSS for Middle School
PhET by NGSS for High School


Spongelab

Already completely gamified for you, Spongelab has  thousands of pieces of content that can be searched, organized and annotated. Take a look,  at their Energy Literacy collection as an example of how to integrate SpongeLab in your gamified classroom.


Glencoe Virtual Labs

VIRTUAL LABS offered by the Glencoe textbook company. These labs give the students the adventure of laboratory experimentation without costly supplies, worrisome environmental and safety issues, or time-consuming clean up. They are from all different areas of science: Biology, Physics, Genetics, Earth Science, Physical Science, and Chemistry.


Go-Lab is a EU-based site that allows science teachers access to online labs and inquiry learning applications. The students receive the opportunity to perform personalized scientific experiments with online labs with access to virtual labs, remote labs and data sets. 
Setting up is a little time consuming, but they have a very well done tutorial.


Gizmos

Gizmos is the only paid service on this list. This service provides hundreds of Science (and Math) simulations, aligned to NGSS and searchable by topic, grade level and/or standard. Gizmos allow for manipulation of variables and include graphing tools that help students compare the results of their experiments, creating opportunities to apply the concepts to a variety of scenarios,


Let's take advantage of our students tech skills and allow them to use simulated tools and experiments. Go ahead and incorporate simulations in your gamified classroom. Your students will thank you for the opportunity to use technology, work in groups using sims as a substitute for real-life experiences and develop the skills needed to excel in the 21-century. 

Wednesday, May 18, 2016

Student AppSmash - A PBL success story


Many of you may have experienced that gut wrenching moment where, before the students have even begun to understand what the PBL experience they are in entails, they have already opened Google slides. The blank stares I get when I dare ask, "Are you sure that a slide deck is the best way to go?", tell me that they are much more product driven than I hope, and that most have been exposed to the "wrong" answer shown in the image above. Presentation equals slides! This is what has driven me to make sure that my driving questions are as vague as possible, at least with respect to the type of product the students create, which brings me to the real reason behind today's post.

A couple of weeks ago, my students began their exploration in our Interdependence of Organisms unit, which culminated in the students "Convincing the general public to care about an endangered species, and developing a realistic plan to bring it back from the brink of extinction".  As always my students launched into "presentation" mode, which was when I officially stated that I was incredibly tired of sitting through slides, so anyone "caught" even thinking about creating a slide deck without a storyboard would lose their tech. I then added that I expected to be entertained, because "no one cares about what is being presented if they are bored, so if the goal was to convince people to care, boring them to tears with slides was definitely not the way to go". What followed was a flurry of student engagement that culminated in one of my favorite student app-smashes of all time - the AyeAye Need You website

http://goo.gl/Z5LVrb


The Aye Aye Need you WIX website includes a student produced screencast-o-matic video, two Thinglinks (one of them used simply as a presentation aid), a HSTRY timeline and a Piktochart infographic.

I unfortunately did not think to record the students' presentation of their work, but their recovery plan included comments like:

- The US and Madagascar are not "besties", so they will need to put aside their differences and work together to restore the forest.

-  Why do we need charcoal? That just pollutes the air. What we need is more Aye-Aye's!


Did the student's achieve the goal of raising awareness, driving action and starting conversations to save the lowly Aye Aye? Yes.
Did they use technology to do it? Yes.
Did they "make a Google slide deck"? Most certainly not.

Now, on to the next step in this PBL evolution - guiding students to develop empathy for the user of a product before even thinking about what the product is/should look like/do.


Friday, May 13, 2016

PBL Toolkit


What do you do when your administrator asks you to show your colleagues how to develop and run PBL projects? Once the meltdown is over, and you have had time to mull things over, you compile a list what you consider your best tools. Here goes:


Project Ideas:

This is really the hardest part, especially when you are just starting out. In the beginning, as you familiarize yourself with the process, your best bet is to use BIE's project searchEdmodo Spotlight or even my own PBL page. Find something you like and that you are willing to do. Know that it will not be pretty the first time around (or the second or third). Trust in the process knowing that once you have run a couple of experiences you will start to feel comfortable and even decide to create one from scratch. When you reach that point, you will start seeing opportunities everywhere. You will find yourself reading an article or thinking about an experience through the lens of, "I wonder what my students could come up with to ...". That is when you are ready to meet with your fellow educators, and develop one you can call your own.

Standards:

Yes, of course you will have to think about your standards. See where that nugget of an idea you had could fit. Truth be told, any PBL experience you create can hit on many standards. The trick is to decide which one you will be teaching explicitly. Don't fall into the trap of simply stating the standard. Decide in advance how your students are going to show mastery of the standard and make plans to point your workshops and activities to address the specifics of the standards.


The Driving Question: 

This is the root of your project, and BIE has graciously shared a handy tool to help with that. They call it the Tubric, and it boils down to something along the lines of:
"How can we as ___ create a way to ____ for ___ in order to address/do/change ___.

Now that you have your project idea, your standards and your driving question, it is time to develop your project. This is where the fun begins.

Entry event: 

Nothing beats a video to catch the student's attention. Thankfully most districts have now decided that YouTube is not the root of all evil. However there are still steps that can be taken to reduce distractions when presenting a YouTube video. Use tools like SafeshareTV or ViewPure to remove comments, advertisements, sidebars, etc.
A novel idea that can be used as an entry event and as a way to encourage deep need to knows is having students participate in a StunConference - a student-led unconference. This takes more time and preparation than showing a video, but it does have the benefit of greater student engagement with the project.

Need to knows: 

These can be collected by the students on Google docs (or in their notebooks). But what about group need to knows that can be easily shared and added to by the whole class? For this, I like to use Padlet and more recently Verso. Both of these remove the stress of students trying to come up with the "perfect" need to know, by allowing them to add and respond long after the project run began. They can also access the tools from any device, so if a new need to know pops up in their head later (while at the store for example), it is simply a matter a few clicks and the idea is added.


Workshops and activities: 

Whether you plan them way in advance or as a response to the needs of your students, you can curate your materials for easy access by your students in platforms such as LessonPaths or Blendspace. For your visual learners, or simply because it is more fun, you may want to create interactive images using Thinglink.


Project page: 

This is where you communicate expectations, as well as host all of the materials your students will need, including the rubrics. You want something that is easy to access and offers flexibility should you need to add things "on the fly" with a minimum of disruption. For me, the answer is WIX, a web page creation platform that allows you to add practically anything, anywhere. If you have never used it, choose from one of their templates. As you become more and more familiar, be bold and create your project pages from scratch. With a little bit of knowledge regarding iframes, you can embed anything without having to worry about figuring out whether what you want to add has an embed code or not. I have used some other tools that also deserve a mention due to their shallow learning curve: Tackk and HSTRY. Both of these are a bit more linear, and have limitations in what can be embedded directly, but for some groups of students this is a "good thing".

Managing a project run: 

Everybody is working on their project, or are they? How do your students communicate their daily activities with you, and how do you manage all those groups without going crazy? It is as simple as Trello, a project management tool that updates in real time, and allows every member of each team to share exactly what they are doing, upload materials, share information, etc. It also provides a space for direct teacher feedback during the run, eliminating the fear of facing a "what did you do all this time?" moment come presentation day. If you want to know more about how I use it, you may want to visit my previous post.


Presentations and Exhibitions: 

Make use of the Ignite format during presentations, or better yet host student exhibitions.


Rubrics and Feedback: 

Your students are done, and have successfully presented their projects. You still have to figure out a way to provide feedback and give access to the graded rubrics. Yes, you can use paper or you can create individual documents and e-mail them to the students. It is a chore no one likes. Thankfully, ForAllRubrics has come to the rescue. Whether you use it as a stand alone product, or as I do within Edmodo, this badging and rubric platform allows you to grade and send the rubrics to your students with just a few clicks.


Reflection:

What is PBL without reflection? Just another project... Invite your students to reflect on their work by having them use this set of questions using Blogger as their platform.


Dive into PBL. Your students will thank you for it.


Thursday, April 28, 2016

PBL - Project Management Made Easier with Trello


A while back I posted some ideas on how to keep the students on track during a PBL run (PBL - Avoiding the pitfalls of "Doing Research"). I've been working with several iterations of the Project Timetable, Daily Project Work Report and Project Management Sheet with some success, but my students and I still struggle with some of the finer points of PBL management in the classroom.

You see, some of my students hear project and immediately jump up to get scissors and glue, while others get a computer and open Google slides. Often I find myself saying, "You don't even know what the project is about and you are already thinking about the final product?" So the question continues, "How can I help students visualize the steps needed to successfully complete a project run without micro-managing?", and more importantly, "How can I see where everyone is at any given time?" I think I may have found the answer in Trello.

Trello is a free project management tool. The interface is simple. You create a board, which is really a list of lists, filled with cards. The cards can include pictures, attachments, checklists, labels and due dates. These cards can be moved around and edited all members of a board. Basically anything that you would need to know about a project run can be added to the board.

Here is how I am using it for my PBL runs:

  1. I create an assignment board master and make it public. The master includes the assignment, specific links I want to share, expected due dates, etc. 
  2. The "press secretary" from each team creates a copy my board master, and shares it with his/her teammates and myself.
  3. As students work on the project run, they update the board, moving the cards from "To do" to "Doing" to "Done", and add the evidence of their work. They can add links, pictures, documents, you name it!
  4. Things in the  "Done" list can be opened  by me to provide feedback. I can  even move things back to the "Doing" for revision. The board is updated in real time, so any time anything happens the students have the "latest" information.


Trello does not have to be only for PBL. Read what Melanie Pinola has to say about Trello. And no, I am not affiliated with Trello in any way. It simply has allowed me and my students to become better at this PBL business.

Sunday, April 10, 2016

The End is Nigh


The end of the school year is upon us. Students are dreaming about that long summer vacation. Behaviour issues are on the rise. You are asking yourself, what can I do to keep students engaged? How can I recap what was learned and end my school year strong?

Below are some of the assignments that I use:


I would love to add to these. What are some of the things you do to keep your students learning until the last day?

Saturday, April 9, 2016

StunConference - A Student Led Unconference


If you are an educator you have probably have heard of un-conferences. Maybe you have even attended a couple. You might have even toyed with the idea of doing one with students, especially if you are a project based teacher. After all, they kind of feel a little like the "need to know" discussions you have after your entry event.

However, the logistics  seem daunting. Where are you going to hold it? How are you going to keep students on track? Do you really have the time? What if the students do not buy into it? What if a session creator gets no participants? These are the questions that good friends and masterful educators Samantha McMillan and Melissa Garcia had a couple of months ago when they decided to "Just do it". Today, I was in Samantha's class and witnessed what I had thought impossible: A 6th grade student led un-conference.

So, what did it look like? Engagement and deep conversation centered around "Imagine the Future". All students were:
- Participating
- On task
- Holding each other accountable
- Learning from each other
It was a teacher's dream.

Now for the tricky part. How do you achieve this?

Your break-out sessions do not need to be separated by walls. Student led un-conferences can be done in a regular classroom. You just need to have students sit together. It will get loud, but not much louder than in any group activity.

Decide on an un-topic conference appropriate for the students. It should be broad enough and interesting to the students. Start with a topic that inspires conversation: Imagine the Future (today's topic), College, Immigration, Equality. You know, the small stuff.
 
Provide students with some time (whether in class or out) to come up with break-out session ideas. Have the "Session Wall" posted for a couple of days at least. It does not have to be fancy, some butcher paper and post-its will do. Make sure you emphasize that not all students need to create a session. Have them read the session wall before adding topics. Remind them that if they want to lead a session that is already posted they can simply participate.

Prepare the students. Explain the structure. Go over the norms. Emphasize collaboration. Here is the website Samantha used with her students for today's topic: StunConferenceAdVENTURE (Be aware that some of her links are specific to her class, so they will not work for you).
With her permission, I have tweaked it into a generic one that you can use in your class, with specific ties to PBL - to make your own copy of the documents open them in Google drive and click File>make a copy. 


The day of the un-conference, take a deep breath and step back. Visit the different break-out sessions as a participant. Above all, avoid taking over. Trust your students and see them soar.


If you are wondering about the electronics, that is where their note-taking documents are.
I invite you to try it out. You will not be disappointed. If you do, tweet it out using #StunConference. 

Sunday, March 27, 2016

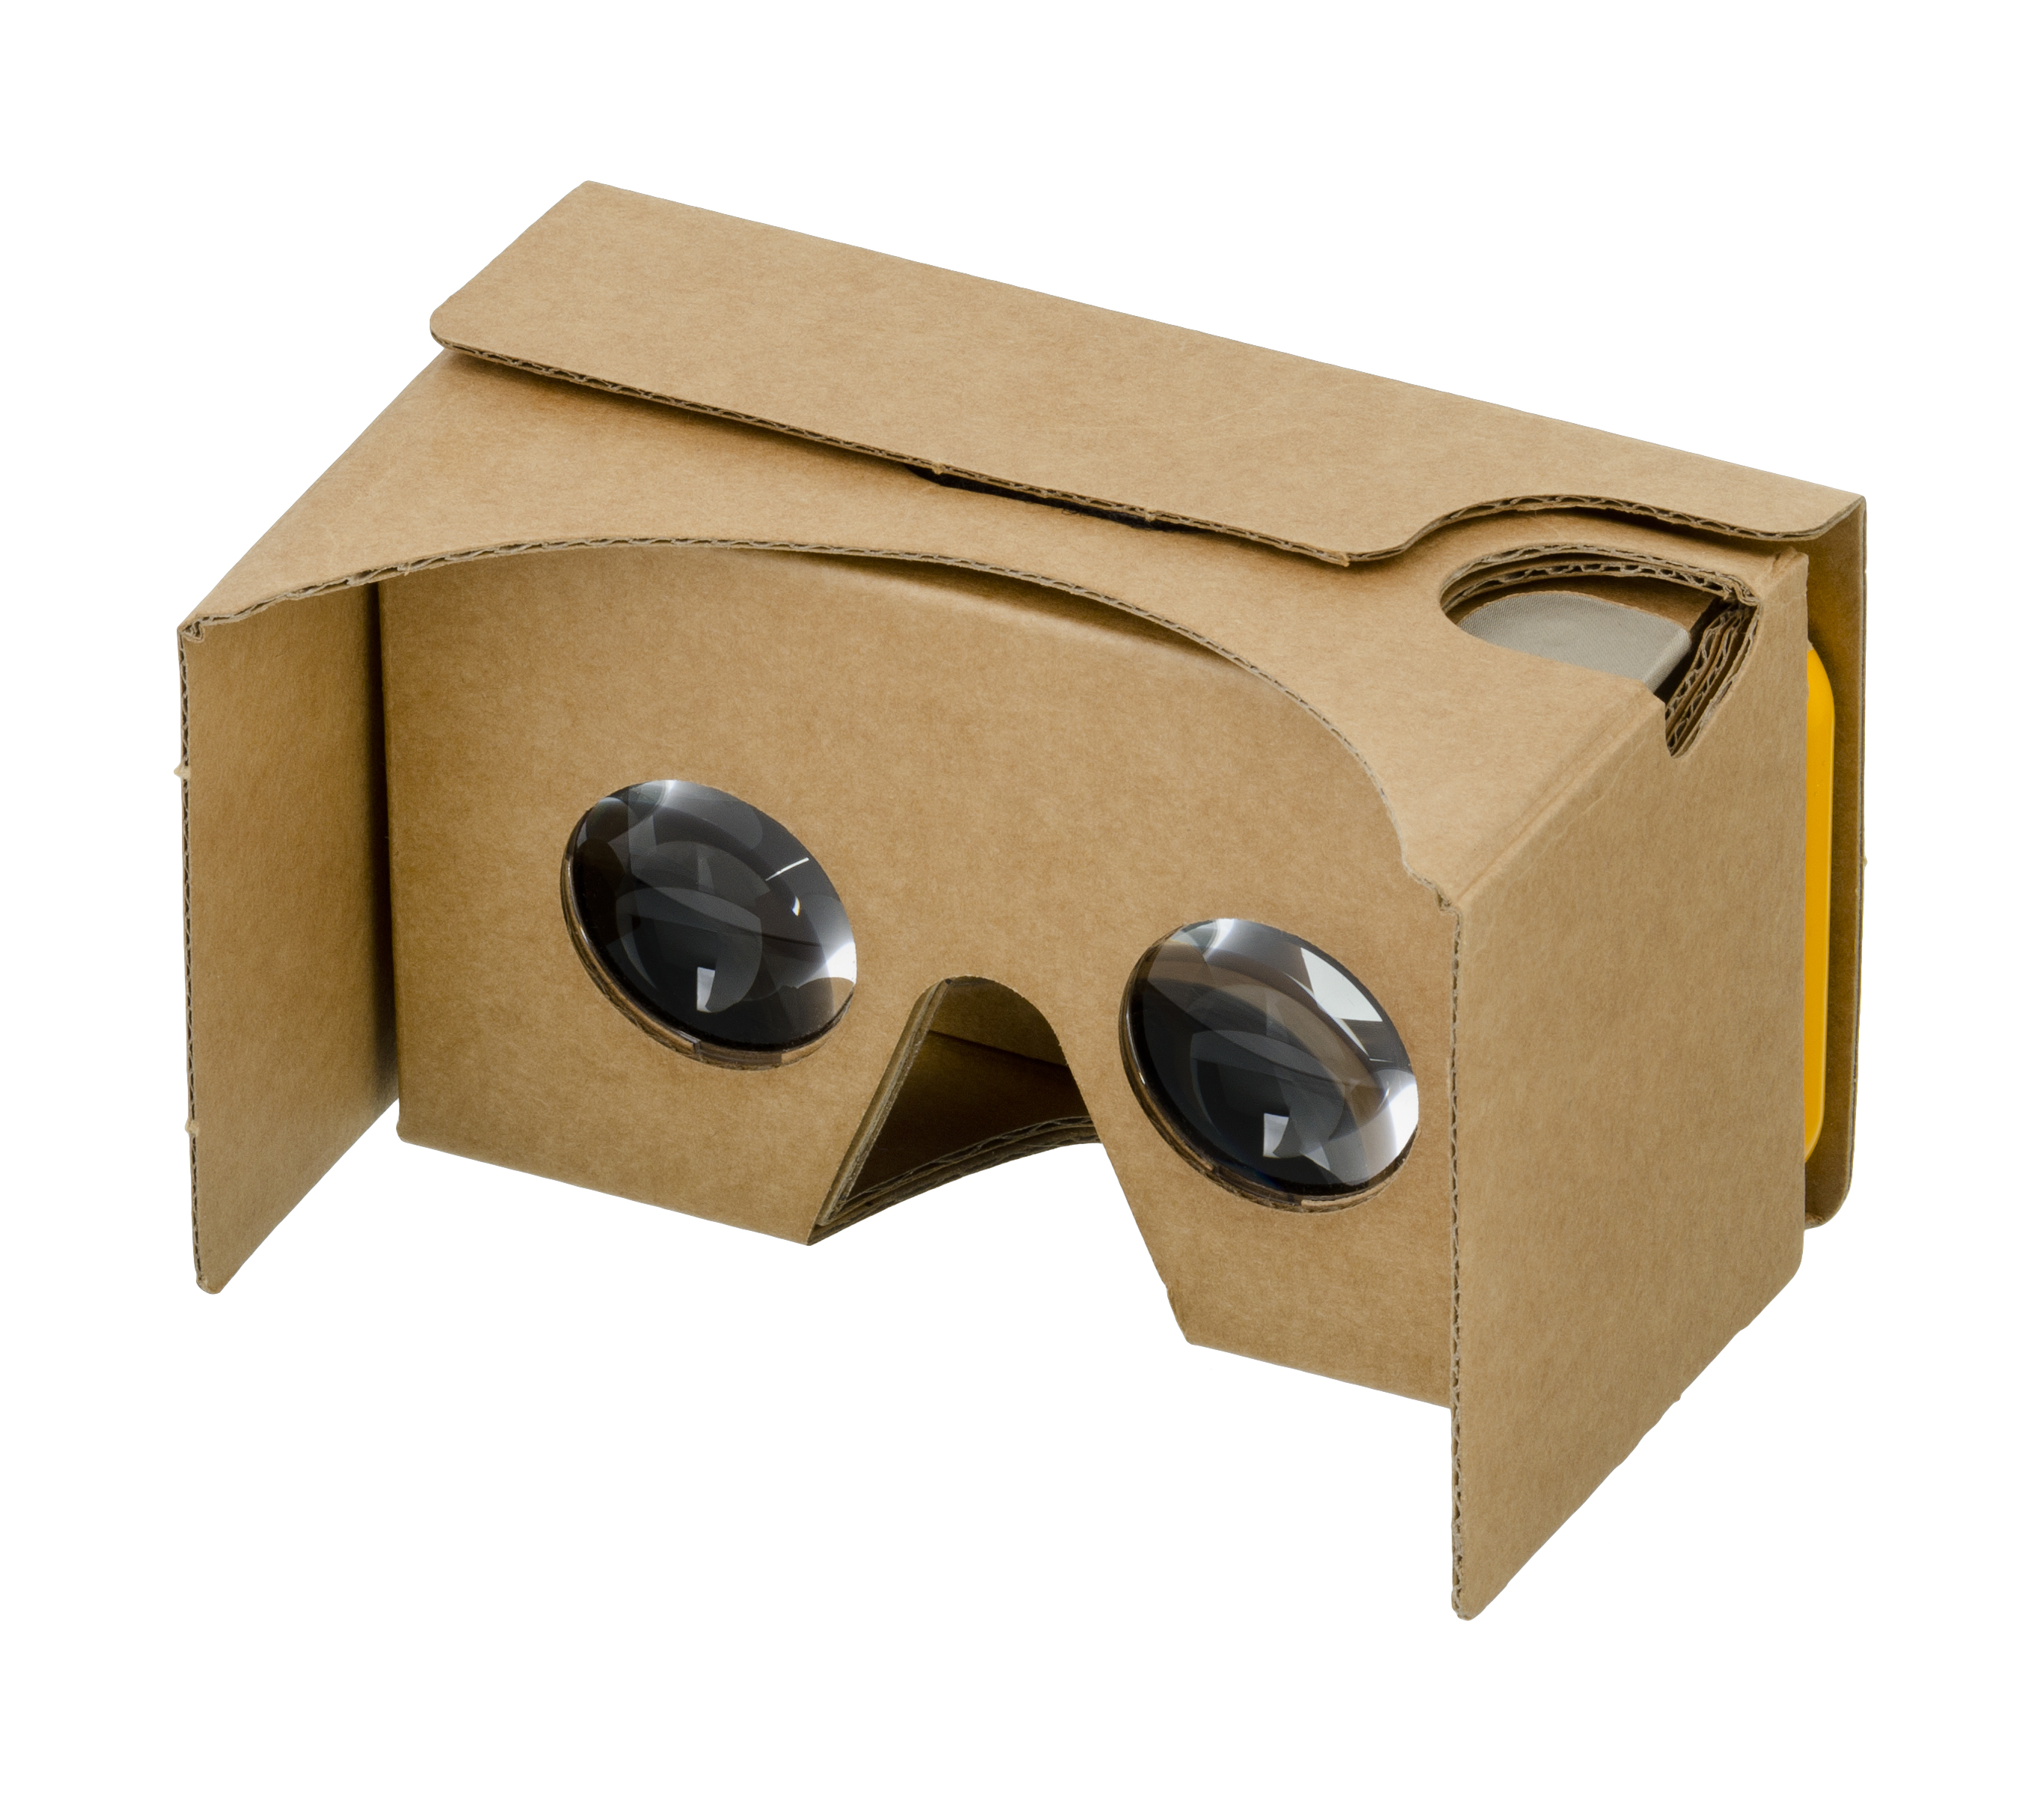
Appsmash: Google cardboard +Tinkercad+Sketchfab


I am going to be totally honest here. When I first heard about Google Cardboard I figured that this was not for me. What could this contraption actually provide for my students that a video could not do? However, all that changed for me while attending the DeeperLearning Conference and landing, almost by mistake, in Carrie Lawrence's "Virtual Reality in Education using Google Cardboard" workshop.

We started with what I thought Google Cardboard was all about. Giving access to far away or impossible places that are now at our student's fingertips. Having never done the VR thing, that in itself was actually quite fun, and the apps she shared were cool. Here are some of the sites she shared and a couple more that I found after the session (all for Android, but I'm sure you can find the same or similar ones in the Apple store). Disclaimer, several of these work better on some devices than others, but don't let that deter you; find one or two that work for your device. Many more are being published.


VR Apps (Android), by mrsgarciaserrato

Now, if you have read my blog before, you know that I am more of a "student create stuff" kind of teacher. I liked the idea, but I was still not particularly enthused. However all of that changed an instant later when she began talking about 3D modeling. You see, there are a couple of tools that when used together enable students to create VR 3D models. This is how it goes:

It starts by you assigning a project that results in a digital 3D model. For example, my eco-house project.


Your students create their model in Tinkercad. This would be my go to since it is free, but I am assuming that other options would work (SketchUp or Minecraft). The limitation is really that the "output" needs to be compatible with our next step.
If using Tinkercad, once your students are done, they would click on Download for 3D printing, and select either .STL, .OBJ or .VRML.


That was the hard part. The next step is simply to upload the file to Sketchfab.


The students can tinker with it some, following these helpful tips from Sketchfab so the VR experience they create is "just right".

And just like that, the students, their parents and yourself can now use Google cardboard to virtually walk all around their model!


Google cardboard can be bought for around $10.00 from Google or Amazon (search for Google cardboard), and they work with any smartphone and even iPod touch devices. Students will also need to create accounts in both Tinkercad and Sketchfab (both free), but check with your IT first to verify that they are whitelisted.


Two additional "mini-hacks" before I go:

- Add a rubber band to the "crease" where the phone goes to prevent it from slipping out.
- Make sure you take the phone out of its case. This allows the use of the "trigger".


Get your "Google Cardboard" on!

Thursday, March 17, 2016

Is it cross-curricular?

Image: http://www.idiagram.com/ideas/knowledge_integration.html


I was in a PD the other day, and we were asked to provide examples of units that were cross-curricular. A couple of teachers started sharing how this particular math lesson was cross-curricular because the students were reading an article. Other teachers shared lessons that specifically said "cross-curricular integration" and used fancy fonts and colors to identify cross-curricular connections. I started thinking, all this is fine and good, but is something really cross-curricular simply because we added a reading? Is a science lesson on density cross-curricular because the students use math skills to arrive at an answer or perhaps included a couple of graphs? If students draw pictures or build dioramas, can I check off the "art" box?

By now, you have probably figured out that my answer is no. This is simply adding stuff. Even if during a science lesson we claim things like students provided textual evidence for their answers, thus "This lesson addresses CCSS.ELA-LITERACY.RI.6.1 Cite textual evidence to support analysis of what the text says explicitly as well as inferences drawn from the text.", unless the skill was specifically taught and assessed as part of the lesson, we cannot say the lesson cross-curricular (or integrated) Science and ELA. It seems really like a happy coincidence. 

So then, what do we mean by cross-curricular integration? A lesson, or unit that is:
  • Based on individual subjects, and their specific standards.
  • Developed by individual teachers, with excellent subject knowledge, working together to connect different subject matters in authentic and explicit ways.
  • Requires sustained collaboration between all participating content area teachers. Not only is pacing of content delivery necessary, but also the teachers involved need to have a relatively deep conceptual understanding of the different subjects being addressed. Going back to our previous example, the science teacher must know just how the "citing of textual evidence" looks like and is taught, while the ELA teacher must be able to explain photosynthesis using the same language as was used in the science classroom.
  • Provides opportunities for students to develop one end product that demonstrates mastery of the content in all the subjects that were considered as integrated. This means for example, that the essay assigned in Language Arts is assessed for craft and structure by said department, but for concept mastery in Science.
In short, cross-curricular integration requires work. This is not something we can do by simply "tweaking" and adding a couple of standards to the list. Let's provide the time for teachers to really develop cross-curricular units. Let's embrace PBL and provide students ways to demonstrate mastery in meaningful ways. The students will reap the benefits!