Showing posts with label student exhibitions. Show all posts

Sunday, December 24, 2017

Embedding a Google Drawing with Clickable Links


I'll start this post by stating the obvious, the easiest way to create a drawing with clickable links/tags is to use Thinglink. This site has been my go-to for any type of image tagging and while I love all their possibilities, including adding custom icons and tagging 360 images, I recently had the issue of wanting to both create the image and the tags at the same time.

A little backstory. 

The culmination of my Interdependence of Organisms unit has my students creating blog posts for different organisms in the Amazonian rainforest where they write about how each organism has a specific role to fulfill in its environment. In class, we then use those posts to create a Google drawing of the food web with links to their work. Everything works great as long as you stay within Google Drawing. It is not until I tried to embed that tagged image the students created anywhere that I realized that those tags the students painstakingly created do not work!

In the past, I've always solved the problem using Thinglink.

But as I mentioned before, this has the "problem" of having to create the image first and then add the tags. In class, this does not always work for a variety of reasons. The most important being that the image is completely static. You cannot change anything on the actual image so the students cannot add any more arrows (or organisms) as they discover other relationships when they discuss their work. Since this is a collaborative end product, the permanence of the image does not work for my purposes.

The workaround

It is a little convoluted, and it requires a little risk-taking simply because of the unfamiliarity you may have with some of the steps, but bear with me. In the end, you will have created the code with working links that can be embedded on any site or platform.

1. Open up a Google drawing. Add your background and items, and tag to your heart's content. In case you do not know how to do this, Karen Ferguson's video does a great job of explaining this.

2. Once you and your students are "done", or even before if you wish, publish your drawing to the web (File>Publish to the web). It does not matter when you do this since any changes you make after the fact will be updated automatically, which is exactly what my students needed. Do not worry about the size or the code at all. You just need it to be "on the web".

3. Go to Google sites, and create a simple blank site. You can name this whatever you like, and edit the homepage to insert your google drawing.

4. Unclick "include border around Google drawing" and "include title". At this point, you will choose your height and width. I recommend setting both to the size of your actual drawing.

5. Save the Google site. This creates a version of the site, with your Google drawing that includes those pesky clickable links you were aiming for.

6. Once you have saved, right-click anywhere on the image and select inspect

7. For those of us not familiar with working with HTML or the developer tools, this is where it gets scary. But don't fret it is simply a matter of finding the code and copy/pasting it in three quick steps:

  1. On the tab that appears, select Elements. Find the code where you see <div id="sites-chrome-everything-scrollbar">, and click on it to expand it.
  2. Scroll down until you find  <div class = "sites-embed-border-off sites - embed"... style=width 800 (or other number) px;" and right click on that.
  3. Select edit as HTML (third option). A box within the space appears, filled with the code you are looking for! Select everything within that box, and copy it.


It should look something like this:
<div class="sites-embed-border-off sites-embed" style="width:600px;"><div class="sites-embed-object-title" style="display:none;">Interdependence Rainforest Blogs</div><div class="sites-embed-content sites-embed-type-sketchy"><iframe src="https://docs.google.com/drawings/d/1ELpo7S7a0htZsqckkHkEtaI3KMXORFPStvVZGnVzt_o/preview?authuser=0&amp;h=400&amp;hl=en&amp;w=600" width="600" height="400" title="Interdependence Rainforest Blogs" frameborder="0" id="811835776" allowfullscreen="true" mozallowfullscreen="true" webkitallowfullscreen="true"></iframe></div><div class="sites-embed-footer"><div class="sites-embed-footer-icon sites-sketchy-icon">&nbsp;</div><a href="https://docs.google.com/drawings/d/1ELpo7S7a0htZsqckkHkEtaI3KMXORFPStvVZGnVzt_o/edit?authuser=0" target="_blank">Open <i>Interdependence Rainforest Blogs</i></a></div></div>
8. Now you can go ahead and paste that full code anywhere that allows you to edit HTML embeds (Blogger, Wix, Weebly, Wordpress, Emaze to name a few) creating your tagged and clickable Google drawing. 

And not only that, any changes you make to the original image immediately populate anywhere you have embedded your image so your students can modify the drawing, adding and deleting elements and tags without any worry about going through the process again!

Additional benefits

Using this method for creating interactive images also has some other "unforeseen" benefits.
  • The students can be in total control of the creation process. Any CC0 image is fair game to be used as a background or for tagging purposes. Once you teach your students to crop things in shapes, they can create all sorts of icons without worrying about size limitations.
  • Recently my district blocked Thinglink for student use. I can share my tagged images with them, but they cannot create accounts themselves and use it to create their own. 
  • Thinglink is not set up to be collaborative, so even if my students went outside of our servers and created personal accounts, they cannot work on one image together. This often defeats my purposes for creating interactive images.
  • It is totally free. You only need access to the Google tools mentioned. Most districts nowadays have given students access to the Google suite, so anything they create using them will not need any paid upgrade of any kind.


I hope this is useful to you and your students, and please drop me a line in the comments section if you find an easier way to do this.

Friday, May 13, 2016

PBL Toolkit


What do you do when your administrator asks you to show your colleagues how to develop and run PBL projects? Once the meltdown is over, and you have had time to mull things over, you compile a list what you consider your best tools. Here goes:


Project Ideas:

This is really the hardest part, especially when you are just starting out. In the beginning, as you familiarize yourself with the process, your best bet is to use BIE's project searchEdmodo Spotlight or even my own PBL page. Find something you like and that you are willing to do. Know that it will not be pretty the first time around (or the second or third). Trust in the process knowing that once you have run a couple of experiences you will start to feel comfortable and even decide to create one from scratch. When you reach that point, you will start seeing opportunities everywhere. You will find yourself reading an article or thinking about an experience through the lens of, "I wonder what my students could come up with to ...". That is when you are ready to meet with your fellow educators, and develop one you can call your own.

Standards:

Yes, of course you will have to think about your standards. See where that nugget of an idea you had could fit. Truth be told, any PBL experience you create can hit on many standards. The trick is to decide which one you will be teaching explicitly. Don't fall into the trap of simply stating the standard. Decide in advance how your students are going to show mastery of the standard and make plans to point your workshops and activities to address the specifics of the standards.


The Driving Question: 

This is the root of your project, and BIE has graciously shared a handy tool to help with that. They call it the Tubric, and it boils down to something along the lines of:
"How can we as ___ create a way to ____ for ___ in order to address/do/change ___.

Now that you have your project idea, your standards and your driving question, it is time to develop your project. This is where the fun begins.

Entry event: 

Nothing beats a video to catch the student's attention. Thankfully most districts have now decided that YouTube is not the root of all evil. However there are still steps that can be taken to reduce distractions when presenting a YouTube video. Use tools like SafeshareTV or ViewPure to remove comments, advertisements, sidebars, etc.
A novel idea that can be used as an entry event and as a way to encourage deep need to knows is having students participate in a StunConference - a student-led unconference. This takes more time and preparation than showing a video, but it does have the benefit of greater student engagement with the project.

Need to knows: 

These can be collected by the students on Google docs (or in their notebooks). But what about group need to knows that can be easily shared and added to by the whole class? For this, I like to use Padlet and more recently Verso. Both of these remove the stress of students trying to come up with the "perfect" need to know, by allowing them to add and respond long after the project run began. They can also access the tools from any device, so if a new need to know pops up in their head later (while at the store for example), it is simply a matter a few clicks and the idea is added.


Workshops and activities: 

Whether you plan them way in advance or as a response to the needs of your students, you can curate your materials for easy access by your students in platforms such as LessonPaths or Blendspace. For your visual learners, or simply because it is more fun, you may want to create interactive images using Thinglink.


Project page: 

This is where you communicate expectations, as well as host all of the materials your students will need, including the rubrics. You want something that is easy to access and offers flexibility should you need to add things "on the fly" with a minimum of disruption. For me, the answer is WIX, a web page creation platform that allows you to add practically anything, anywhere. If you have never used it, choose from one of their templates. As you become more and more familiar, be bold and create your project pages from scratch. With a little bit of knowledge regarding iframes, you can embed anything without having to worry about figuring out whether what you want to add has an embed code or not. I have used some other tools that also deserve a mention due to their shallow learning curve: Tackk and HSTRY. Both of these are a bit more linear, and have limitations in what can be embedded directly, but for some groups of students this is a "good thing".

Managing a project run: 

Everybody is working on their project, or are they? How do your students communicate their daily activities with you, and how do you manage all those groups without going crazy? It is as simple as Trello, a project management tool that updates in real time, and allows every member of each team to share exactly what they are doing, upload materials, share information, etc. It also provides a space for direct teacher feedback during the run, eliminating the fear of facing a "what did you do all this time?" moment come presentation day. If you want to know more about how I use it, you may want to visit my previous post.


Presentations and Exhibitions: 

Make use of the Ignite format during presentations, or better yet host student exhibitions.


Rubrics and Feedback: 

Your students are done, and have successfully presented their projects. You still have to figure out a way to provide feedback and give access to the graded rubrics. Yes, you can use paper or you can create individual documents and e-mail them to the students. It is a chore no one likes. Thankfully, ForAllRubrics has come to the rescue. Whether you use it as a stand alone product, or as I do within Edmodo, this badging and rubric platform allows you to grade and send the rubrics to your students with just a few clicks.


Reflection:

What is PBL without reflection? Just another project... Invite your students to reflect on their work by having them use this set of questions using Blogger as their platform.


Dive into PBL. Your students will thank you for it.


Sunday, March 27, 2016

Appsmash: Google cardboard +Tinkercad+Sketchfab


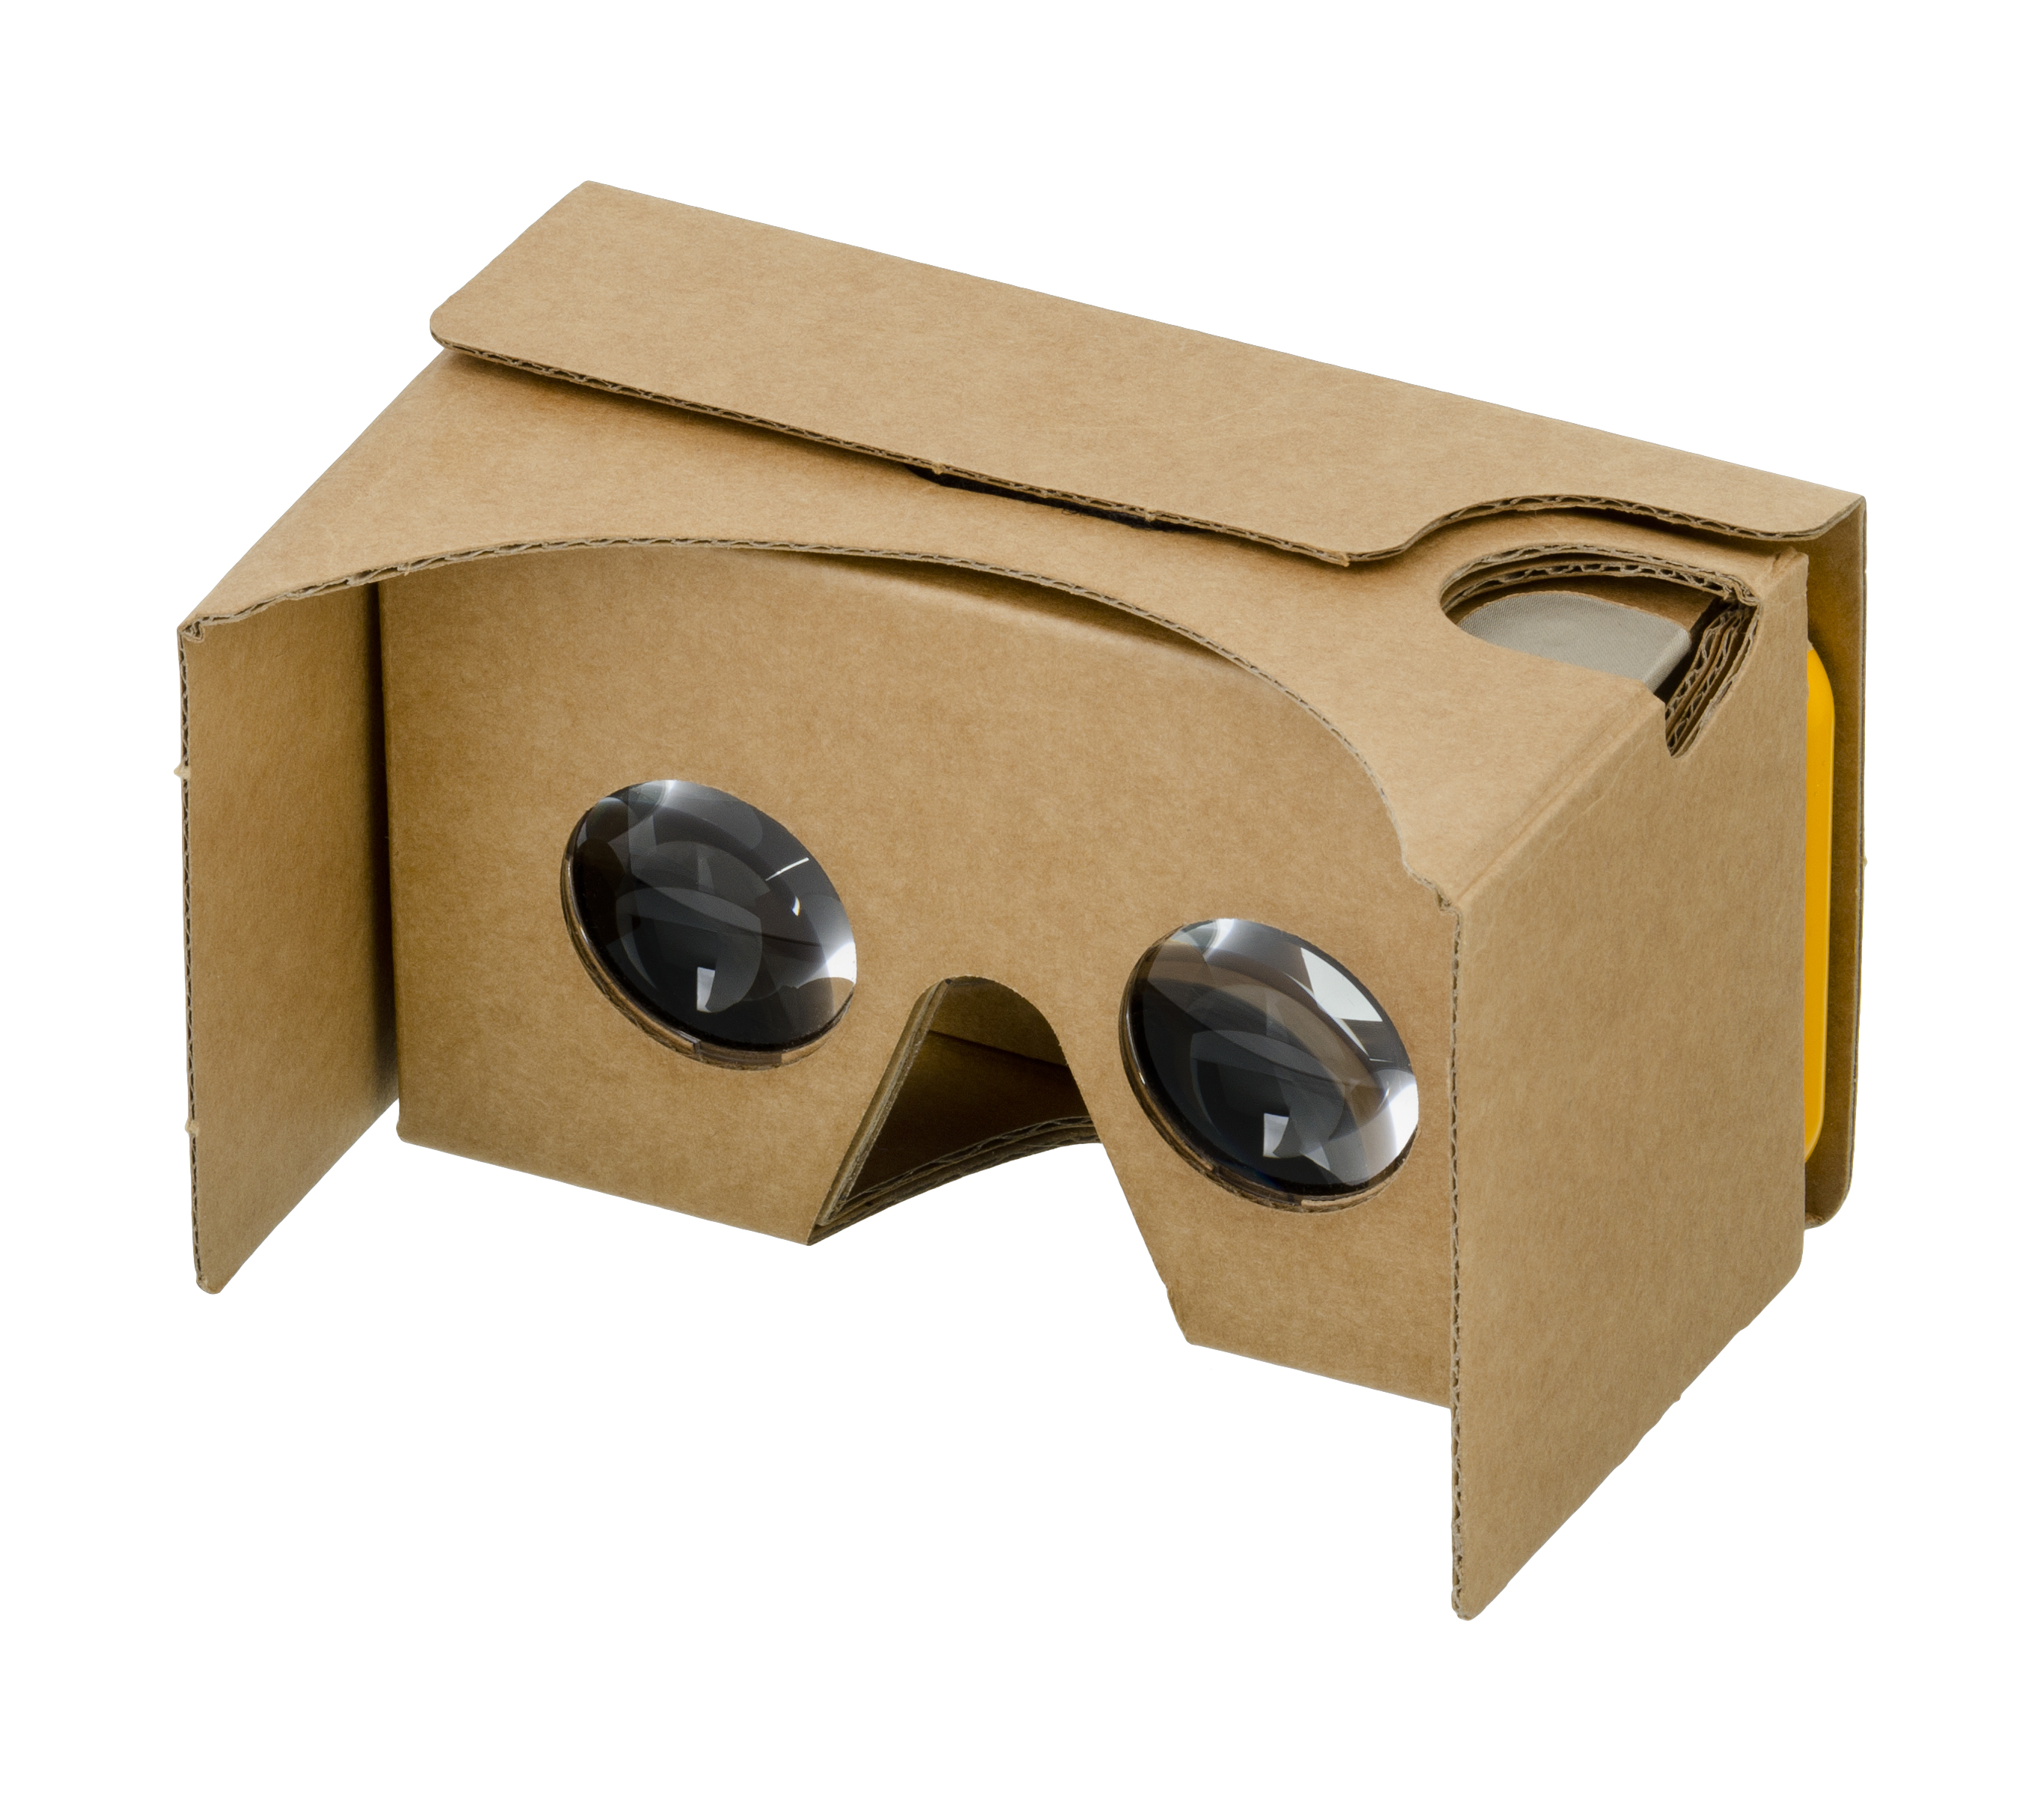
I am going to be totally honest here. When I first heard about Google Cardboard I figured that this was not for me. What could this contraption actually provide for my students that a video could not do? However, all that changed for me while attending the DeeperLearning Conference and landing, almost by mistake, in Carrie Lawrence's "Virtual Reality in Education using Google Cardboard" workshop.

We started with what I thought Google Cardboard was all about. Giving access to far away or impossible places that are now at our student's fingertips. Having never done the VR thing, that in itself was actually quite fun, and the apps she shared were cool. Here are some of the sites she shared and a couple more that I found after the session (all for Android, but I'm sure you can find the same or similar ones in the Apple store). Disclaimer, several of these work better on some devices than others, but don't let that deter you; find one or two that work for your device. Many more are being published.


VR Apps (Android), by mrsgarciaserrato

Now, if you have read my blog before, you know that I am more of a "student create stuff" kind of teacher. I liked the idea, but I was still not particularly enthused. However all of that changed an instant later when she began talking about 3D modeling. You see, there are a couple of tools that when used together enable students to create VR 3D models. This is how it goes:

It starts by you assigning a project that results in a digital 3D model. For example, my eco-house project.


Your students create their model in Tinkercad. This would be my go to since it is free, but I am assuming that other options would work (SketchUp or Minecraft). The limitation is really that the "output" needs to be compatible with our next step.
If using Tinkercad, once your students are done, they would click on Download for 3D printing, and select either .STL, .OBJ or .VRML.


That was the hard part. The next step is simply to upload the file to Sketchfab.


The students can tinker with it some, following these helpful tips from Sketchfab so the VR experience they create is "just right".

And just like that, the students, their parents and yourself can now use Google cardboard to virtually walk all around their model!


Google cardboard can be bought for around $10.00 from Google or Amazon (search for Google cardboard), and they work with any smartphone and even iPod touch devices. Students will also need to create accounts in both Tinkercad and Sketchfab (both free), but check with your IT first to verify that they are whitelisted.


Two additional "mini-hacks" before I go:

- Add a rubber band to the "crease" where the phone goes to prevent it from slipping out.
- Make sure you take the phone out of its case. This allows the use of the "trigger".


Get your "Google Cardboard" on!

Thursday, November 26, 2015

Three ways to display student work

We all know the importance of displaying student work. Displaying student work send the message that the teachers and community values the work they do. It allows opportunities for students to learn from each other and make connections that they might have otherwise missed.

Unfortunately, not only do we have limited wall space, but the classrooms displays need to be taken down to make room for new work. All that hard work gets given back to the students and usually gets tossed out for recycling as soon as it gets home. 

You might think to take a picture of the display, but the pictures seldom not come out well enough for students to use them as reference. You might also be thinking about the impossibility of these classroom displays to show growth of a student or even whole class over time. This is where digital tools can come in handy.

These are my current favorites:


Thinglink

Shared with me by fellow Edmodo user Christi Collins, Thinglink is touted as the "leading platform for creating interactive images and videos for web, social, advertising, and educational channels." This user friendly digital tool provides students and teachers with the ability to turn any image into an interactive graphic. You can create multiple clickable spots within an image, and turn them into a multimedia launcher that can be used to include other images, video, audio or provide a link to any URL.


SpicyNodes

SpicyNodes is a mind mapping tool that provides "a way to visualize online information that mimics that way that people look for things in the real world. Bits of information — such as text, links, photos, and other media — are placed into "nodes," which are then linked together in an appealing interface that invites exploration." You can use spicy nodes to display student work not only for the sake of sharing, but also to provide opportunities to make connections between the different pieces of work that they created themselves.


HSTRY

Hstry is a web platform that allows students and teachers to create and explore interactive timelines. However, it really is so much more than a timeline. You can use it to create assignments and projects, the students can use it to create responses and draft portfolios. You can even use it as I did here to create an interactive display of student work. As with the two previous ones, the user can insert images, videos and text. If you use it for assignments, you can even include formative and summative assessments!


All of these were created with the same body of responses to a single assignment as a way to show you the possibilities of each webtool. 

Have you found other digital ways to display student work? Share them with us in the comments so we can all benefit.


Saturday, February 28, 2015

Student Exhibitions, an Integral Part of Project Based Learning


Student exhibitions are not the traditional open house you might have experienced, where the teacher selects some material to show to parents, and breathes a big sigh of relief when "cookie cutter" projects finally make it home. In the project based model we use at AdVENTURE, exhibitions have the students front and center as they present work, chosen by them. The students are doing most of the talking and are actively explaining their work. 

Student exhibitions are about celebrating hard work. They give students an authentic audience to present their work, and showcase their learning. The final product often takes a secondary role as the emphasis is put on the journey the student took to get there. The celebratory nature of the event gives students an opportunity to engage in deep conversations with community members, and take on the risk of becoming a "teacher of adults".

Exhibitions promote deep learning of the content. The projects being presented are the end result of an extended, in-depth period of learning, and require that students demonstrate mastery of the content and standards. Students show that deep explorations in learning can have many different paths, and provide students with new questions to guide their inquiry.

Exhibitions are also about accountability. Community members get to see first hand what the students are learning. This goes beyond rigorous academic content, and includes 21st-century skills. During the event, students get to demonstrate how they have grown in leadership, responsibility and innovation, as well as practice communication skills authentically.

Student exhibitions provide a sense unity of within our community. Although our PBL is not static, and new essential questions lead our students down different paths, the content remains. Our older students are given an opportunity to reminisce about favorite projects, and often take on the role of mentors for the younger students, giving knowledgeable and caring feedback. On the other hand, the younger students get to see what older students have done, and on occasion, even begin to plan for what they now know they will work on in the upper grades.

Finally, student exhibitions increase student engagement. Students take ownership of their work because they know their work will have an audience beyond their teachers and classmates. Although at times, students have been known to say "Another exhibition night? We've had like five...", you just need to see the pride on their faces during the actual event to know that our exhibitions are here to stay.

What do you think? Leave your comments and let's start a conversation.